Dress up your door

Yarn Wreath Tutorial.

Crumb Cake

Who would've thought?

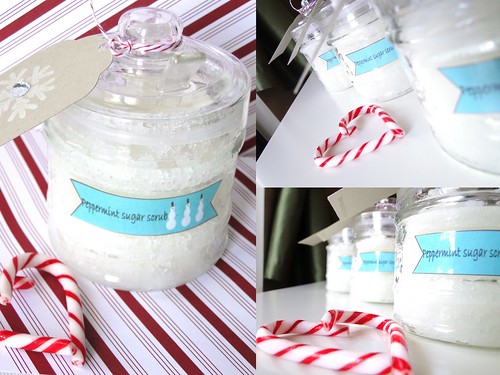
Coconut Sugar Scrub

A simple, yet luxurious gift. Don't forget to make one for yourself!

Friday, August 28, 2009

TCC Feature Friday- Pumpkin Petra

It’s Friday, it’s Friday!! and I’m going on vacation Whohoo!!

Sorry, I was doing a little happy dance there…I’m leaving for Los Angeles tomorrow and will be back next Friday.  I still have a million things to do before I leave, why does prepping for vacation seem stressful?

Here is my project for The Character Cafe Store feature Friday, using one of the new fab August releases.

I used the Taylor’d Expressions layout from last week for this, and I have to say…this card wasn’t supposed to turn out the way it did! lol

I used the great Halloween Bo-Bunny paper again, and really wanted the purple paper to be the focus, but I think it got lost a bit in the orange.  The orange paper is two sided, but silly me wasn’t paying attention when I put my glue on, so both ended up showing the same side!  Oh well, I added a black ribbon, and I think it’s alright.

I used a stamp I got last year in the Michaels $1 bin, and I just love this saying! Too cute and goes perfectly well with Pumpkin Petra.  Now, you may notice something about Petra; and by no means do I mean any disrespect to the lovely and talented Kendra and Kelly (creators of TCC)…but I cut Petra’s wings off

I know, I know, but I just wasn’t feeling Petra as a fairy for this card, so write your hate mail down below and let me have it ;)

I really connected with Petra…mostly because I was a pumpkin in this EXACT same costume for many many years! I’ll see if my mom can send me the picture- she made the costume and we filled it with grocery bags so I was a very round pumpkin. Except I made this “swishing” sound when I walked! LOL

I coloured Petra with watercolours, as well as the lettering in the sentiment.  I added some Clear Effects to Petra’s eyes and the pumpkin face.

Some MS glitter added some bling to the pumpkin.

I distressed all the edges of the paper with black ink and a make-up applicator…by far my favourite way to distress at this point.  I’d love to know what you use, I can learn so much from all of you!

Now go explore and see what the other team members have created for you, you can find their links on the right hand side.

I’m going to go try and get as much stuff as I can done before I leave tomorrow.  I will be sure to post a bunch of pictures from L.A. and will start bringing back my “Snapshot Sunday” feature.

Fingers crossed I see some celebrities! I’m hoping for Robert Downy Jr…I need to know why we have to wait until July 2010 for Iron Man 2! Seriously!

Have a great weekend, and I’ll be back next week with another Feature Friday AND the release of Stamp Insanity Stamps- I cannot wait for you to see these!!

Happy Friday,

Ciao for now,

Tuesday, August 25, 2009

Locks of Love haircut donation day!

Rewind approximately 3 years ago.  *ring* goes the phone at 7am on a Saturday morning…my first thought is, “who the hell…”; then “Oh no! what’s wrong??”.  Nothing was wrong; one of my best friends Alison was calling to tell me her long-time boyfriend FINALLY proposed and they were officially engaged!

Fast-forward a few weeks when Alison called again to ask me to be a bridesmaid.  Not long after that I decided I would leave my hair long so as to have multiple options for the wedding.  It wasn’t long after that I decided that I would cut it after the wedding and donate my hair to Locks of Love; an organization that takes human hair and creates wigs for children who suffer from permanent or temporary medical hair loss.

After reading the requirements of the donation process, and realizing I needed at least 10” of hair to donate, I made the commitment to do it.  When people commented how long my hair was getting, I told them why I was doing it.  It brought awareness to the issue, as well as reminded me on the days when I was fighting to style my hair WHY I was doing this.

Alison and Jamie married last summer, and my hair wasn’t yet long enough, so I kept going.

And so, each time I visited my hairdresser, she asked if I was still on board, and mixed my colour with no bleach. Processed hair is acceptable, but the hair cannot be bleached, so no highlights are allowed.  Apparently the hair will break down during the process if it’s bleached. 

So I stayed in the dark browns and red colours, and realized it complimented my skin tone and my eyes much more than my traditional strawberry blonde ever did.

I had fun with my long hair, I played with different up do’s, barrettes, clips, headbands.  

And then…it was ponytail, after ponytail.  My hair started to get caught in my watch.  In the seatbelt.  Under my purse strap.  I was over it.  A desperate plea to my visiting sister to measure my hair to determine if the timing was right, confirmed it.  I had 10” of hair in a ponytail, and still left me with hair left over.

I made the appointment, filled out my hair donation form and walked into the salon saying “today is the day!”

Here’s the before pictures:

DSC08980 DSC08984

This is the longest I’ve ever had my hair, well, I think in my whole life!


And here is the after:DSC09065


profile1

I feel free. 

Liberated.

Lighter.

Happy.

I accomplished a goal I set for myself 3 years ago.


I made a donation to a wonderful cause to help wonderful children in not-so-wonderful situations.

And I couldn’t resist a Posh Spice/Victoria Beckham pose:

DSC09087

Do something good today :)

Happy Tuesday!

Ciao for now,

Technorati Tags: ,

Saturday, August 22, 2009

Boo Witchy Mini Pizza Box

*if you’re looking for The Character Cafe Blog Hop, please scroll down to the next post…but you can look at this one too, it’s an additional project :)*

I mentioned in my post yesterday I didn’t have a chance to finish another Boo Witchy project in time for the hop, but it’s now done and ready to share :)

I found this mini-pizza box tutorial on SCS which is very easy and really fun to make.  I thought it would be perfect for some Halloween Treat boxes with Boo Witchy.

I used the same Bo Bunny Halloween paper, and made my own little tags for the sentiment.  I just cut the edges off the rectangle, and then distressed with black ink.  I used the tiny black flowers I got from Margie (thanks Margie!) and tied some ribbon to the back of the brad before I attached it to the tag.  I added some sparkles to Witchy’s hair for a little extra bling.

The box finishes up at 4x4x1 and holds 3 mini Halloween chocolate bars quite nicely…you might be able to fit another one horizontally across the bottom.

I really like the pizza box because it’s from one sheet of paper and it opens and closes from the back, so there’s no separate lid to make.

I made a cute little set of four, and they’re for sale now in my Etsy store.


Try it out and link back so I can see what you created :)

I’ll be back on Monday, tonight we’re heading to my friend’s parents place on the way to Toronto to drop off her dog.  We’ll spend the night and early tomorrow morning we’ll be heading into Toronto for a 5km run/walk to support our Ontario Kinesiology Association.  The run/walk will be in The Beaches, but it’s supposed to rain, so finger’s crossed it holds off!

After the run, we’ll get ready and have a rest at my sister’s place because tomorrow night we’re going to see Blink 182 and Weezer in concert! whohoo! I’m very excited since Weezer was touring last year but I couldn’t go because of my leg surgery…and who would’ve thought after the plane crash Blink 182 would get back together! It should be a good time :)

Happy Saturday!

Ciao for now,

Friday, August 21, 2009

TCC August Release Blog hop!!

TGIF TGIF TGIF TGIF

did I mention I’m Thanking Goodness it’s Friday?

What a week!

But it’s the 3rd Friday of the month and it’s time for another round of new and fantastic images from The Character Cafe Store and boy are you going to love them!

This hop is bitter sweet, it’s our last round on our current DT term, but I’m very happy to pass the torch, err, I mean ink {?} to some other deserving stampers.

This is the first DT stop on our hop, so hopefully you came from The Character Cafe design team page. But if not, you can still start here…I’ll post the blog hop list at the bottom for your reference.

I was so excited to get my image for this hop; I got to use my new find- the most delicious Bo Bunny Halloween Paper and I do mean delicious! Have a look and let me know what you think:

And I don’t even like Halloween! LOL

I printed out my Boo Witchy image and coloured her with watercolours. I printed a few images {I’m working on another project with this image, but just couldn’t finish it in time…so come back and visit!} and cut out the fence to add a little dimension.

I distressed all the paper and added some black ink to all the edges. A fold of the corner, a bite from my Cropodile and some ribbon in co-ordinating colours finished it all up. I think there’s a bit too much space, I might try printing the image off on coloured paper, or cutting it out and mounting it- so many options with digi stamps!

Here is the order for the Blog Hop

Me :)

Heather

Kendra and Kelly

Colleen

Elaine

Billie

Tesa

and finish at The Character Cafe Blog

We do ask that you leave a comment on each blog {and become a Character Cafe blog follower if you’re not already}in order to be in the draw for a Character Cafe image at the end of the hop. Add a link to the hop on your blog and let us know and you’ll get a second entry! Easy peasy!

*EDITED TO ADD* So, apparently I missed the memo- LOL. Here's a code for 30% off your next purchase at The Character Cafe Store: 58620271, it is valid from Friday Aug 21st 12:00pm until Tuesday Aug. 25th at midnight.

Not all the images are Halloween; August’s release has quite a well rounded image collection, there’ something for everyone!

Happy Hopping! {and Happy Friday!}

Ciao for now,

Tuesday, August 18, 2009

I love orange!

and grey, and ribbon, and when you put them together, you get…

I used the Fall-to-Layout 43 for this one, from the Clean and Simple Stamping blog. It was modified a bit, but that’s what sketches are for, right?

I stamped my favourite GinaK designs Retro Boutique and then paper pieced the dress with my other new obsession, Basic Grey paper.  I tied some orange ribbon on the dress, and added a little bling with a stick-on rhinestone.


A simple Happy Birthday sentiment from the same set is on the inside, and a matching strip of BG paper.


I have used this stamp set over and over and each card has such a different feel, it’s wonderful!

Happy Tuesday!

Ciao for now,

Sunday, August 16, 2009

I Love sketches!

And I just love the Fall-to-Layouts on the Clean and Simple Stamping Blog.  How did I not find these earlier??

I came across a card at my fellow  TCC DT Colleen’s blog the other day where she mentioned the CAS blog and it was just the right amount of inspiration for the birthday cards I needed to make to drop off at the hair salon.

I made 3 cards, but will share them with you one at a time…only because I don’t know how much stamping/blog time I’ll have this week.  My best customer  Mom called telling me that a very good friend of our family is turning 80 this year and there’s a surprise birthday party for him.  Unfortunately both my sister and I live out of town and won’t be able to attend.  My mom wants something flashy and I have just THE thing; so I’ll be working on that and some other projects this week.

Now to the card; I think I will use this layout over and over again.  I’m totally obsessed with the colour orange, and buttons, and distressing, so this is one of my favourite cards :)

I used the Fall-To-Layout (FTL)52 for this first card.  I NEED to go buy more Kraft paper, I just love this stuff! {yes, I know, I love a lot of things ;)}

I used Kraft for the card base, Chocolate Chip for the scalloped piece, with my SU scallop edge punch {anyone know how to sharpen that thing? I’ve only used it a few times, and it doesn’t always make a sharp cut}, Pumpkin Pie for the layering and ink, Very Vanilla for the image and sentiment panel and my fav Birthday Whimsy stamp set.  The button is from some blog candy I won a while back, and then some string I had in my stash.  I distressed with my Tim Holtz distressing tool, with some new Tim Holtz Tea Stain distressing ink {it’s very subtle, I’m still playing with it and applicators}.

I’m trying to remember to decorate the inside of the card, and I think I skip this step because I get stumped.  I do recall someone saying, just mimic the front and it will all fit.  So I layered the coloured cardstock over the Very Vanilla, used the scallop punch again and stamped another present in Pumpkin Pie.

I’m going to go back to relaxing on the couch.  I walked/ran a 2km course this morning in memory of my friend’s step mom who lost her battle to cancer in May.  We had a great turn out {79 people raised $12 000, which is incredible!} and I’m looking forward to doing it again next year.

Happy Sunday!

Ciao for now,

Friday, August 14, 2009

TCC Feature Friday- Bertie and Friend

TGIF!

The first week back from vacation is always a hard one and my work load was really heavy.  I’m happy it’s Friday and I can take a little break because next week will be very busy as well.

Here’s my TCC card for this week; I picked the Bertie and Friend image.  I have wanted to work with this one for a while and thought it was perfect for the highlighting technique.  The technique is very easy to do and gives some eye popping results. 

I used black cardstock and a silver metallic paper with black accents so the colours would really pop.

I printed out the image twice (love those digi stamps!) and used my nesties to cut out specific parts of the image.  I like the highlighting to be a little off centre, it’s a little more interesting.  For example, take a look at the butterfly.  It would be very easy to have the whole butterfly in the circle and it would have a completely different effect.


I popped up the highlights on dimensionals for a little more oomph.


Want to try it yourself? Head on over to The Character Cafe Store and put this image in your shopping cart- it’s so versatile!

Make sure to hop around to see what the other DT members created for us to ogle at :)

Elaine ~ Kendra and Kelly ~ Shelley~ Billie ~ Colleen ~ Heather ~ Sara ~ Tesa 

Mary is taking this week off, she’s sick with the flu! Feel better Mary!!

Happy Friday!

Ciao for now,

Wednesday, August 12, 2009

A TTIC Wednesday Challenge- Anything but a card

*blink* *rub eyes*. Yes, your eyes are not fooling you. This is for a TTIC challenge. It has been soooooooo long since I have been able play, and this is even more unusual because it’s my 2nd post for today.

BUT, I saw this challenge and had to play and had to post because {I’m hoping} you will enjoy it.

A special Wednesday challenge was issued by the ladies at TwilightTuesday.com and sponsored by Club Scrap. The challenge was to create ‘anything but a card’ using the Men and Women of Twilight theme. You can read more HERE.

I had this wonky idea just come to me and just remember, it said “anything but a card”.

I have great confidence that Edward and Bella perform random acts of kindness for each other. I also happened to randomly remember that my roommates and I used to write notes to each other each day; sometimes asking to take our clothes out of the dryer, or to wish each other luck on an upcoming exam. And thus my ‘anything but a card’ was born.

Edward left a sticky note for Bella on the bathroom mirror:

{I used a MFT stamp from Baby on Board}

Bella left one for Edward:

{insert giggle here}

Happy Wednesday Evening!

Ciao for now,

Unpacked and back to the stamping table!

I have finally unpacked from the cottage and have gotten myself organized enough to get back to stamping.

While I work on some new projects and tutorials I thought I would share some cards that I didn’t get to post while I was away.

A few weeks ago my good friend D had her last day at work and wanted to have some mini-thank you cards for her team to show her appreciation to them. D has decided to focus on her swimming full-time in preparation for the Commonwealth games next year.

D needed 9 cards, but I could only fit 8 in my photo box :) The two blue ones are for the guys on her team. D picked a few different sentiments “to wonderful you from thankful me’; ‘because nice matters’; and ‘impressed, amazed, inspired {by you}’. I added some ribbon loops to the girls’ cards and tied smaller ribbon for the guys’ cards. A few extra rhinestones on the girls’ cards kept things simple but added a bit of ‘glitz’. I love these little mini cards! All sentiments are SU and I just love this little set.

Here’s also a shower card I originally created for my friend L, but then decided to make her the Explosion box {click HERE to see that post}.


It seems while I was away I forgot how to take pictures, so sorry they’re so dark!

Here’s a close up shot of the umbrella and sentiment .

Image and sentiment are SU Blooming with happiness.

And here are some thank you cards I made for my sister’s Mary-Kay clients. Keeping with MK, I used different shades of pink and the Fifth Ave Floral set from SU. I used my Score-pal to make the border at the top and stamped Thank You from the SU set “thanks”.

I like how these cards came out and I’m happy that I didn’t use any embellishments and it’s only one layer! I just might get this ‘simple’ thing after all!

Of course it’s Wednesday, so go check out the Work it Wednesday at the The Character Cafe blog and participate in the challenge!

Happy Wednesday!

Ciao for now,

Monday, August 10, 2009

Back Home and some exciting news!

OK, so I know it's somewhat late for a post, but I'm literally waiting for my toothbrush to charge so I can brush my teeth and go to bed! lol

I'm back home in London, ON after a week up north at the cabin my family rents every year.
This was our 10th year up there and we book at the same time as the people we met the first year; we've become quite the little family!

The weather could've been better, but my dad the techno-wizard brought an external hard drive hooked up to some media player, a bunch of cords and an adapter and voila! DVD quality movies played without a DVD player on a TV that is 20 yrs old! Gotta love technology! We did have a few storms and were rained in our first full day there, but after that, the rain was limited to overnight or during the dinner hour...I have a picture of my dad BBQ in a monsoon that I'll be posting later on. I still managed to get a sunburn though, it was on a very windy day and I was fooled. It was only on the tops of my legs, but they're still red...and I'll have to buy some sunless tanner to even up the back of my legs, or I'm going to look pretty silly in California in a few weeks when we go to L.A.!

I was quite the little bookworm~ it was so nice to just read and not be interrupted by the phone, or work. I devoured The Book Thief and I'm 3/4 through Inkheart, which I've been wanting to read for quite a while. I'm really liking it and my friend recommended The House of Night series, so I picked up books 1-4 and those are on my reading list next.

While I was away, I had some great news; Tonya the oh-so-fabulous owner of Stamp Happens accepted my application for her Stampin Sistah's design team! I'm soooo excited to be a part of this team with some of my TTIC friends and some new lovely ladies too!

I must say, I have seen the sneak peek at the stamps and, my friends, put your pennies away right now, because you will want to scoop them up as soon as they arrive!!

I'll be updating my blog with the DT members and links to their blogs tomorrow, I still haven't completely unpacked and should do that and a few other things before bed tonight.

Happy Monday!

Ciao for now,
S

Friday, August 7, 2009

TCC Feature Friday- Keep Out!

Another Friday, another feature for the July releases of The Character Cafe images.

This project was hard for me to keep simple…I sometimes struggle with masculine cards or projects, I find them hard to embellish.

I created a doorknob hanger and sign for a boys’ room.

Keepout1 copyI used SU Chocolate chip for the base, and Ballet Blue (I think, lol) for the next layer with some blue, green and brown polka dotted paper from my stash.  The great thing about digi stamps is the ability to resize, and it’s so easy!

I created the sign in the size I needed, adhered it to some thin cardboard for stability and coloured with my watercolour pencil crayons.

I’ll be back from the cottage soon, with my creative juices ready to flow once again!

Make sure to check you check out what the rest of our design team created and find out who our Guest designer is for this week who is featured on The Character Cafe Blog.

Billie ~ Shelley ~ Mary ~ Colleen ~ Heather ~ Tesa ~ Elaine ~ Sara ~ Kendra and Kelly 

Happy Friday!

Ciao for now,

Wednesday, August 5, 2009

TTC Work it Wednesday

Another Wednesday, another tutorial and another challenge over at The Character Cafe Blog.  This week’s host is the always awesome Shelley who will be working with ribbon.

I’m enjoying a beverage on the beach right now (hopefully) up at the cottage, but go over and make something so I can see it when I get back!  You’ll be entered to win some amazing prizes!

Happy Wednesday!

Tuesday, August 4, 2009

Age is only a number…

Are you missing me while I’m away? lol. Here’s another card so you don’t forget me all together.

I received a stamp set from Inkadinkado for my birthday, from my fellow stampin’ and all around good friend Jen.

All the stamps are birthday themed and are a bit non-traditional, and I love every one of them!

This has to be my favourite image and sentiment and as I was looking for some paper, this one jumped out at me.


Isn’t it perfect?!!!! (not sure why it’s so crooked…maybe I had a few martini’s during this photo shoot ;)

The image doesn’t have a martini glass, but when I saw the hand on the hip, I just knew the other hand had to have a drink in it. So I drew one and cut it out and glued it on.

This lizard just has ‘tude…know what I mean?

Here’s the inside of the card:

I found this martini stamp years ago in the $1 bin at Michaels and wish it had a “cheers” stamp to go with it.

I’m totally feeling the retro vibe and really loving the colour orange…maybe it’s because all of this cool fall weather we’ve been having!


Happy Tuesday!

Ciao for now,

Monday, August 3, 2009

A fish in the making?

By now I am up at the cottage, and hopefully enjoying the beach.  This summer hasn’t been the best for sunshine and hot weather, so I could also be sitting inside reading or watching movies.  But I can deal with that :)

I thought I would share some pictures of my God son Ethan and taking him swimming for the first time in my pool.  Ethan loves the bathtub and loves splashing…but he didn’t seem to know what to do with ALL that water.

DSC08728

DSC08735

Here he’s looking at his dad who decided the water was too cold to go in, and sat on the side of the pool.

Ethan is the master of serious looks :)


DSC08750

He’s still not too sure about all this water…


DSC08762

We put him in his fish, he was very intrigued by the valve, and the smaller fish on the front of the tube.


Success! we have a smile!

DSC08761 

DSC08785

This is my absolute favourite picture, I’m so proud to have been photographer that day and to capture Ethan’s first swim!

Happy {Holiday} Monday!

Ciao for now,

Saturday, August 1, 2009

KABOOM! the Big and Loud reveal!

Finally I can share this project with you…it’s been a tough week to keep this under wraps.  But the recipient should have this project by now, so lets recap

Peak #1

DSC08809


#2


#3

So, did you guess it was for a Bride? for her shower?

I had a gift card as a gift from her registry, and initially made a gift card holder for it.  But I thought it was boring.  So I looked around for some ideas and found a tutorial by the lovely and uber talented Patti.  I traveled up to Michaels and bought the Basic Grey Ambrosia paper I had been eyeing for WEEKS!  I was finally allowed to buy it because I had a project that I would use it for (in an effort to halt my paper hoarding).

So, without further ado…my Explosion box!

explosionboxbridalshowerlid copy

You can see here I’ve tied the gift card to the ribbon that I threaded through the lid of the box.  I created a small loop and threaded it through the lid, and then made a bow (my flower shop skill) and attached it with floral wire to the ribbon loop.  I used a simple knot to tie the ribbon to the card- this way the card is visible and not accidentally thrown away.

explosionboxbridalshowerhalfopen copy If you’re not familiar with explosion boxes, as you pull the lid, the card falls open…KABOOM! it explodes! well….not really, but you get the idea.

explosionboxbridalshower1 copy

TA-DA! This is the card when fully opened.  I used a few different SU stamp sets to put a message on each of the 12 squares.  I used SU basic grey, pumpkin pie and bordering blue.  I used my snazzy new flower punch and my MS heart punch using the cardstock and DP for some accents.

You can click on the picture to make it bigger.

I added some glitter and ribbon to some images, and attached the flowers on floral wire to have them stand up.

This is something that is hard to capture in pictures, but I’m incredibly proud of this project and I know I will be making more explosion boxes.

Go try it, it’s easier than you think and the effect is incredible~ make sure to leave a comment or a link so I can see how you did your explosion box.

Happy Saturday!!

Twitter Delicious Facebook Digg Stumbleupon Favorites More
This Is A Do-Follow Blog