Dress up your door

Yarn Wreath Tutorial.

Crumb Cake

Who would've thought?

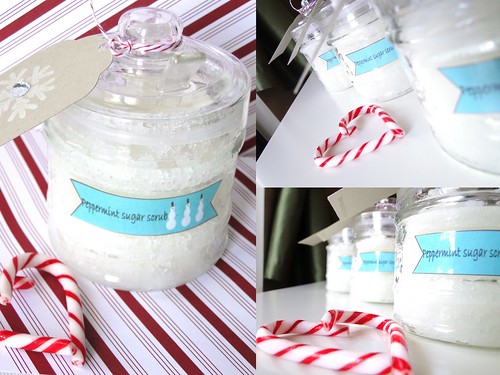
Coconut Sugar Scrub

A simple, yet luxurious gift. Don't forget to make one for yourself!

Wednesday, June 30, 2010

Recipe- Crepes

DSC06392 My love for crepes began in Paris, when I was there on vacation in 2008.  We were lucky enough to be staying just two blocks from the Eiffel Tower, where I sat for each of the three nights we had in Paris waiting for the lights to turn on, and ate my crepes. 


I ate them in cafes, from crepe-wagons, and anywhere else I could get my hands on them.  I liked the chocolate ones, but to be honest, the plain sugar ones were my favourite.

My aunt has a crepe maker, a small paddle like pan that you plug in; when it’s hot, you dip it in the batter and magically your crepe is made.  I’ve looked them up online, but have never seen them in a store.

I made due with my regular frying pan for months, so I’m here to say you do not need a fancy pan.  I did pick up a crepe pan at the St. Lawrence market last month, it was $15.00, so that’s what I use now.  They do have them at Williams and Sonoma for a reasonable price, and a kit is available too.

The key is the batter, and in my opinion, the spatula.  My advice- use a wooden spatula/flipper.  It won’t scrape your pan, and my silicone one gave me nothing but trouble.

(I even changed my wooden spatula half way through this batch)

Here’s the recipe I use for my dessert crepes:

Ingredients:

  • 1 and 1/2 cup flour (I use AP)
  • 1/2 tsp salt
  • 3 eggs
  • 1 cup milk
  • 2 tbsp sugar
  • 2 tbsp melted butter
  • water as needed

1. Add flour to your mixing bowl and make a well.  Add salt, eggs, milk and sugar into the well. 


2. Stir to mix, gradually pulling in the flour.

3. Strain, if desired. (I desire)

4. Stir in melted butter.

5. LET REST! 1-2 hours.  I cover mine and put it in the fridge for about 1.5 hours, and then let it rest at room temp for the last 30 minutes or so.

6. Thin out the batter with water.  This is CRUCIAL! Add water slowly, about 2-3 tbsp at a time.  You want the batter to be thinned out to the consistency of light cream. (I equate it to 2% milk consistency…try not to get it to be like skim milk)

7. Heat pan.  I heat my pan on high, then turn it down to medium; the crepes cook very quickly.

8. If you need to- grease your pan- my frying pan was coated and I don’t even use it in my crepe pan even though it’s suggested

9. Make sure you’re pan is HOT! Ladle batter into pan- I use a scant 1/4 cup of batter- this may depend on the size of pan you have- work fast and tip the pan to coat the entire surface with the batter.

11. Flip your crepe when the edges start to lift off the pan and bubbles form (like when making pancakes).  When the edges lift up, it’s really easy to slide your wooden spatula under the crepe, push the edge of the spatula to the middle of the crepe, and you can flip the whole thing over in one turn quite easily. 

10. Your first crepe will be a write-off. I promise.  You will flip it too early, or your pan won’t be hot enough, or your batter too thick. It happens. Regroup, add more water to the batter if you have too, and move on.

I love my crepes with fresh strawberries; I typically heat them with a tiny bit of sugar and water to make a hot sweet strawberry mess.  I’ve also made them with white peaches and nectarines, just as delicious.  Plain crepes are delicious, but ice cream, whipped cream or some melted chocolate on top makes them extra special!

Eh voila!

DSC03436 

The crepes freeze really well, they’re great to keep on hand.  I wrap them in plastic wrap, then in a big freezer bag and keep them flat in the freezer.  They don’t take long to thaw, so you can whip up dessert in no time!

Don’t be intimidated by making crepes.  The truth is, I can’t make pancakes to save my life! but I’m a pro at making crepes. Go figure!

Bon Appétit!

Ciao for now,

*I’m a fan of dessert crepes, not meal crepes, so if you want to make these for dinner filled with veggies, meat and cheese, omit the sugar in the recipe.

Tuesday, June 29, 2010

mmmmm strawberries!

Summer is by far my favourite season.  I love the summer flowers, days at the beach, and oh, those summer nights! (shameless reference to the best musical of all time…)

One of the great things about summer is the food! Sweet peaches and cream corn, fresh peas picked off vines taller than you, and the strawberries!

We’ve been blessed with an early growing season, so the berries are plentiful (we still have to wait for the corn and tree fruits).  I’ve been a little hooked on strawberries (and watermelon, but that’s another post); I’ve been making crepes in my new crepe pan nearly every weekend and going through a quart of Ontario strawberries each week.

Ontario strawberries are small, irregular shaped and a gorgeous red colour.  None of those genetically-modified-perfectly-shaped-greenhouse berries that seem just a little too picture-perfect for me.

I think the Ontario strawberries are photo worthy…don’t you agree?

DSC03654


DSC03659

I’m hooked on Strawberry Crepes…I’ll post the recipe tomorrow.

What’s your favourite strawberry recipe?  Share below or send me a link!

Ciao for now,

Monday, June 28, 2010

My favourite flower

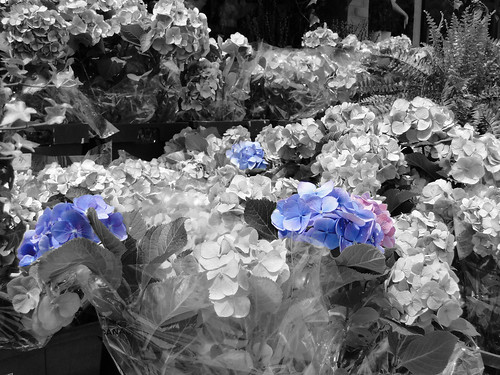
Hydrangea. That is my favourite flower. I have a blue Hydrangea blossom tattooed on the inside of my right ankle. I love the blue Hydrangea the most, but the white is so pure an innocent; the pink so fun and flirty; and the deep purple so royal.

As part of my photography classes’ final assignment (weeks ago) we had to take pictures of something blue. I went on a walk about in the city and found my favourite flower, lining the sidewalk outside of a downtown florist.

DSC03146

Here’s the same photo edited in PSE.


Flower market

I’ve been thinking about taking some of my photos and creating some photo cards to sell. What do you think?

Happy Monday,

Ciao for now,

Saturday, June 26, 2010

Ketchup

Hello strangers!

This is my sad attempt at catching up for neglecting my little piece of the blog-universe.  Work has been crazy, what with staff summer vacations, the G20 summit in Toronto and general all around craziness that is working in health care/insurance. 

I started my learn to row session here at the local rowing club, and am really enjoying it.  It’s a pricey sport, so I haven’t decided if I’m going to continue…and you typically sign up with a group that way you can go out in a 4-person boat, so it depends on when they would want to row, and…of course…work.

In my somewhat spare time, I’ve been addicted to watching the World Cup soccer games.  I played soccer for 8 years when I was a kid, and forgot how much I loved it.  I think next summer I’ll sign up for a rec league.  I was cheering for Italy, but they *cough* were eliminated *wipes tears*.   So I need to pick a new team to cheer for now.

Needless to say, I haven’t had much time to play with paper…and when I do, after the cutting and gluing and rhinestone adding; photography, editing and listing; twittering and facebooking…I really didn’t feel like blogging.

So here’s some things that I’ve made in the past little while:

I simply adore these colours! DP is Basic Grey (sorry, I must’ve thrown out the name of the paper); card base is SU Very Vanilla.  The stamp is from my stash, and is stamped in SU Old Olive.  Ribbon is SU So Saffron, and some paper flowers and a rhinestone brad.  I distressed all the edges and used some TH Frayed Burlap distressing ink.

A simple batch of mini note cards- they measure 3x3 and I used up the last of some awesome paper. I really love these colours together! Card base is Bazzil Truffle, I believe. It’s much more rich than SU Chocolate Chip…if paper can be rich.

I used some of my favourite Japanese handmade paper for this bridal shower card.  I’ve played a bit with this layout, as you can see from the birthday card above; it’s definitely a keeper!  Stamp set is SU Bloom with Happiness.

I’ve got a few custom orders to work on, some birthday cards and another project I hope to share with you soon, AND there’s a soccer game on this afternoon….so I better get moving!

Happy Saturday!

Ciao for now,

ps- all of the cards mentioned are available in my Etsy store!

Tuesday, June 15, 2010

Texting part 2

Here’s another wedding card using the same Text paper and stamp set from yesterday; I think I like this card even better!

The layout of this card is very similar to yesterdays, but I didn’t add as many layers, and used the card base as the background. I really like the feel of the Kraft paper and the text, it feels very ‘shabby chic"’ and I think is very different from some other of my cards…but I love it! I don’t know if I’ll be able to recreate this feeling, or if it was just a fluke, but I’m going to enjoy it while it lasts.

The great thing is that two cards will ever be alike because of the text on the paper.

It’s always more special to have something that’s one of a kind :)

This card is available in my Etsy store , which of course is the site to find all sorts of OOAK items!

Happy Tuesday!

Ciao for now,

Monday, June 14, 2010

Texting

And not the cell phone kind…although I am a fan of that too.

I’ve always been envious of the effect that text, whether it be a stamp or a page ripped out of a book can add to a card.  I didn’t really think I could adapt it easily into my ‘style’ (which seems to change daily), but I guess it’s all about finding the right text.

I spotted this text-paper at my LSS and loved it immediately. Coincidently, all the text is about love, and I was due to make some wedding cards for the summer.  With a few coordinating pink papers and ribbons, I’m very happy with how the cards turned out.

Here’s the first one I have to share:

Isn’t that paper great?? the entire 12x12 is set up like a dictionary of various words and their meanings, with sayings in between some of the verses.

“Multiply it by infinity. Take it to the depths of forever and you’ll still only have a glimpse of how much I love you”

*swoon*


I used the SU stamp set “To Have and to Hold”, which is my go-to set for wedding cards, I just love it!  The main image of the bride and groom is larger, but I liked the way the small circle looked and the text was highlighted instead of the image.  All the paper is double sided, so the punched flowers show the reverse sides of the DP.  Some satin SU Pretty in Pink ribbon, rhinestones and some pink colouring on the bride’s flowers and it all came together quite nicely!

You can find this card at A Paper Buffet, it’s perfect for the summer wedding season!

Tomorrow I’ll share another card featuring the same paper, with some slight variations.

Happy Monday!

Ciao for now,

Thursday, June 3, 2010

Father’s Day cards with Stampendous; Part 3

Hey friends,

sorry for the delay on more Father’s day cards, that darn job of mine keeps getting in the way;)

Here’s another card I made with the Father’s Day set from Stampendous, “Thanks Dad”.

This card uses the sentiment as the focal point, instead of the tie image that the set includes.

I really love this “Dude” paper from Paper Loft!


I roughed up the edges with a Tim Holtz paper distresser, then inked the edges with some SU Chocolate Chip.


I used SU Very Vanilla for the sentiment and found some BG buttons that matched the colour scheme perfectly, and ties into the circle pattern on the paper.


I’ve left the inside blank, and distressed the edges of the paper to match the front of the card.


This card is currently available at A Paper Buffet.

Happy Thursday!

Ciao for now,

Twitter Delicious Facebook Digg Stumbleupon Favorites More
This Is A Do-Follow Blog