Dress up your door

Yarn Wreath Tutorial.

Crumb Cake

Who would've thought?

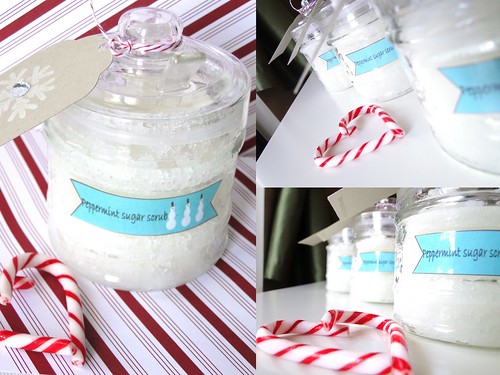
Coconut Sugar Scrub

A simple, yet luxurious gift. Don't forget to make one for yourself!

Saturday, June 27, 2009

Caption Contest for Snapshot Saturday

This picture popped up on my screen saver and made me giggle,

DSC01623

This picture was taken at Fisherman’s Wharf during my trip to San Francisco in 2007.  The seals have been quite the attraction in the harbour and they are noisy! but so funny to watch and listen to.

I thought it’d be interesting to see what you would come up with as a caption for this picture.

Leave a comment below and let’s see what we can come up with!

Happy Saturday!

Ciao for now,

Friday, June 26, 2009

The Character Cafe Feature Friday: Fairy Belle

Welcome to the first Feature Friday of the summer!  Today each of the design team members will be showcasing one of the June releases on their blog. 

Last weekend’s blog hop was a success! so thanks to all who hopped along and congrats to the winners of the draw.

This week, I picked Fairy Belle to play with, and I was inspired by this week’s theme at ThursdaySweetTreats “Whimsy of Colour in Mid-Flight”.  I haven’t played along with TST for so long, so it was nice to be part of it again.

I wanted Fairy Belle to illuminate the night sky, so here she is!

FairyBelle1 copy

I masked an oval on a piece of white card stock and sponged with all shades of blue and grey ink to create the night sky.

I sponged the oval with Barely Banana and softened the edges of the oval with some white ink and my watercolour brush.

FairyBelle2 copy

Here’s a close-up of Fairy Belle, I’m thrilled with how she turned out.  I’m really starting to get the hang of this colouring!

I cut her out with nail scissors!- they were the only ones that were small enough, but they were perfect!

I popped her up on dimensionals and I had printed a second Fairy Belle image knowing I wanted to double her wings.  I added some sparkle and some Crystal Accents to her eyes.

I knew I wanted something a bit extra on the card, so I added some iridescent ribbon and made a tag that can be personalized with a name or a sentiment.

Before I send you off to the rest of the DT blogs, make sure you check out The Character Cafe Blog next Wednesday- July 1st.  It will be the first Work it Wednesday, where a team member will showcase a technique or tip and there will be an open challenge to all you crafty people.  In honour of Canada Day (Happy Birthday Canada!) Kendra and Kelly have been kind enough to offer up a Character Cafe image to the winner of the challenge!

So run, don’t walk, to check out the rest of the DT creations!

~Billie ~ Colleen ~ Elaine ~ Heather ~ Kendra&Kelly ~ Mary ~

~Sara ~ Shelley ~ Tesa~

Happy Friday!

Ciao for now,

Thursday, June 25, 2009

Wedding Menu card Update

She picked…..

The white one!


I had a gut feeling…since we’ve known each other since we were 4, I thought she would go with this one.


I’m very excited about this project and getting to be a part of the wedding in this aspect.

I’ll be sure to provide updates, I have visions of all the cards laid out on my dining room table already!

Make sure to come back tomorrow for the first Character Cafe Feature Friday, where each member of the design team will be showcasing a project from the June release.  I can tell you that the June images are so cute, 3 of us picked the same one!! Also, be sure to check out The Character Cafe site to see if you won in our weekend blog hop!

I’m still recovering from my cold, but thanks for all the get well wishes :)

Happy Thursday!

Ciao for now,

Monday, June 22, 2009

Custom Wedding Order- Menu cards

**If you’re looking for The Character Cafe Blog Hop, please scroll down to Friday’s post**


Happy Monday!

Hope everyone had a great weekend; I saw the Sound of Music on Saturday in Toronto and it was fantastic! I highly recommend it!

Some of you have been following me for a while and so you know my friend L has asked me to do her menu cards.  I got stuck on a few designs, but I’ve narrowed it down and she loved it!

Now we’re in the last stage, I’ve sent her two samples in two combinations and she’ll be deciding shortly.

The stamp set is SU Fifth Ave Floral, (my fave) and is stamped in white and silver metallic ink on black card stock.

The Buon Appetito stamp I had custom made by TerBearCo on Etsy and I’m so thrilled with how it turned out.


Same card and style, but I’ve reversed the black and white combination.


So, which one do you like?  Which one do you think she’ll pick?

I’ll keep you posted!

Happy Monday!

Ciao for now,

Saturday, June 20, 2009

Snapshot Saturday: The Sound Of Music

**If you’re looking for The Character Cafe Blog hop, please scroll down to the next post**

For the summer my “Foto Friday” feature will move to Snapshot Saturday (or maybe the occasional Snapshot Sunday) as Fridays will now be Feature Fridays for The Character Cafe where all members of the Design Team will be sharing a new project each week using the awesome Character Cafe images.

As you read this, I will be traveling on a train to Toronto to meet my sister, cousin and mom to see The Sound Of Music at The Princess of Wales Theatre.  I thought in honour of this trip, I will share some pictures of Austria from our European family trip last September when we took The Sound of Music tour.

DSC05243

The majority of the film took place in and around Salzburg, Austria.  The painted bull marks the start of the tour, where we hopped on our tour bus.

DSC05254

This palace was used as the exterior of the Von Trapp house, but is about a 30 minute drive outside of Salzburg.

DSC05255

The tree-lined road Maria walks up and sings the song “Confidence”.  It doesn’t lead to the house, but to another palace.

DSC05258

THE gazeebo!  it’s not in it’s movie location, but was moved here, near the tree lined roads to keep tourists away from the palace.  It was at one point open to the public, to walk in and out of…but they had to close it after an 82 yr old woman was recreating Liesel’s scene of jumping from one bench to another.  Can you see the big gap in between the bench on the left and the one in the front? Yes, the 82 yr old Liesel-wanna-be fell while trying to make that leap and hurt herself.  So they closed the gazeebo. 

DSC05282

This is the church in the town of Mondsee where the real Maria and Captain Von Trapp were married.

The Austrian Countryside:

DSC05263

DSC05273

The gardens where Maria and the children ran through in the movie, with the Salzburg Palace in the background.DSC05298


DSC05307

I hope you enjoyed this little glimpse of the Sound of Music locations.

And now, you know it was all coming…

Feel free to sing along:

And yes, you sing along on the bus tour as well ;)

Happy Saturday!

Aufwiedersehen!


Thursday, June 18, 2009

The Character Cafe Blog Hop and June Release!

Hi Everyone!

Welcome to A Paper Buffet!

I’m so happy to be on The Character Cafe Design Team and be a part of their first blog hop!

You should have arrived at my blog from Sara’s Blog.  If you haven’t, please go back to The Character Cafe Design Team Page to start at the beginning of the hop. 

This is the last stop on the hop to collect your special discount code, which must be collected in the proper order to receive a whopping 50% off coupon for The Character Cafe! (valid until Tuesday, June 23rd)  You should also have a freebie by now, and have commented on all the blogs along the way to qualify for a prize at the end of the hop.

But before I give you that crucial last piece of code, I would like to introduce to you Cupcake Pewter:

Isn’t he just too stinkin’ cute? {once you get to know me, you’ll realize I LOVE puns! so get used to it :) }

The beauty of digi stamps is you can make them any size. Oh the possibilities! 

The DP is Me and My Big Ideas, all cardstock is Bazzil and some Prima flowers to add some colour.  I used watercolour pencils to colour Pewter and some very light fun flock for his white fur (you can click the picture to see it enlarged).  I hand wrote the sentiment on the bottom.

Ok, I know you’re all waiting, so here’s your last piece of code:

X (in caps)

One last hop to The Character Cafe Blog.  Make sure to comment on this post (and have commented on all previous posts of our wonderful Design Team), comment on The Character Cafe Blog and become a follower for your chance to win some awesome prizes!

1st prize is 3 images +Wedding Bling ; 2nd runner up is Wedding Bling! Yowza! 

Thanks for hopping by! {I warned you about the puns}

Hop along to The Character Cafe Blog.

Happy Thursday!

Ciao for now,

ps- thanks to my friend Julie for my new super duper awesome watermark! You’re the best Julie!!

Wednesday, June 17, 2009

In Concert: No Doubt with Paramore

A little break from cards…

Last night I saw No Doubt with Paramore in Toronto, and I must say…it’s the concert to beat for 2009.  It was INCREDIBLE!

DSC08226Paramore opened and they were good.  Although I must admit, they were a bit loud…it seemed like the vocals were a few settings lower than the guitars and drums and made it hard to hear the lyrics.

The DSC08232bass player did this insane and jaw dropping, leap/summersault/back-flip while STILL playing guitar! It happened so fast, there was no way to capture it on film, but it was incredible!


And then came No Doubt.

DSC08249

No Doubt had soo much energy, and the 20 000 people in the stands soaked it up!

DSC08251

Their stage was awesome, and very good for taking pictures :)

DSC08265


DSC08303


Adrian in his tutu

DSC08305

DSC08320

One of the funniest moments was when Gwen pulled a guy out of the audience because he had written out the lyrics to a song he wanted to hear

DSC08274

He danced, she sang…until she stopped and said “those are the wrong lyrics! where’d you get them…the internet?”  She laughed at him, but it was all in good fun!

I took some video, but it’s taking forever to upload, so I’ll save that for another day.

Tomorrow is The Character Cafe Blog hop, we’ll be starting tomorrow night…details are still being finalized, but make sure to come back and visit.

Happy Wednesday!

Ciao for now,

Monday, June 15, 2009

I made The Character Cafe Design team!

I found out on the weekend I’ve been accepted to The Character Cafe’s first Design Team!

I’m very excited to be on this team, it’s my first design team, and we’ll be using Digi stamps…which I just started working with!

Our debut blog hop and new release will be this Thursday!

In the meantime…go have a look at The Character Cafe store, pick out some goodies, and come back on Thursday for the blog hop!

The announcement hasn’t gone up on The Character Cafe blog yet because we’re still working out the details and working on our first projects, but eventually all our links, and info will be there.

I’ll be updating my blog with all the DT member’s links once we get it all settled…so stay tuned!

Happy Monday!

Ciao for now,

Sunday, June 14, 2009

Stampendous Changito in a TTIC double challenge; and my first digi stamp card

I have quite a few birthday cards to make for June, so I decided to use the June TTIC sketch layout for one of them.  I did have to alter it slightly, but since this card is for a boy, I couldn’t add any flowers to it! lol

I haven’t inked up my Changito stamp in far too long and thought he would be perfect for this birthday card for my friend Chris (my Godson Ethan’s dad).   This is also a double TTIC entry because I combined the June sketch with this past Tuesday’s challenge-  Summer! 

Summer is my favourite season, my birthday happens in the summer, we go to the cabin, bonfires and days at the beach. Ahhhhh.  I grew up in a city with 15 lakes within the main city limits, so I was never far from the beach, and it was fantastic.

Ok, on to the cards!

Changitobeach1.1

Here he is! isn’t he adorable!  I just love this little guy…but he did give me some trouble.  I had to colour 3 images before I was happy with the final product…don’t you hate when that happens!

I wanted this to look like Changito had it in the water with him, so there’s lots of paper tearing and distressing (which is fast becoming my new favourite thing to do to paper) and I’m happy with the way it turned out. 

Changitobeach2.1

I used Crystal effects for the inner tube, snorkel, goggles and fins to give it that authentic plastic look.


I have to say, I think the sentiment is my all-time favourite, and it was the reason I bought the stamp in the first place!

Changitobeach3.1

It still makes me giggle!

A few weeks ago, I was lucky enough to win some blog candy from my friend Andrea which happened to be a digital stamp from The Character Cafe named Syd the Squirrel.  Now, you know how I feel about squirrels!…but I think this guy has got a place in my heart :)

Syd the Squirrel1.1

Digi stamps let me practice colouring…and Syd was no different than Changito…it took me 3 times to get it how I wanted it, but that’s the great thing about digi stamps…just print it again!

Syd the Squirrel2.1

I used SU Creamy Caramel and Close to Cocoa ink with my water painter and layered and layered…I’m not patient with waiting for the layer to dry, so I need to get better at that!


I added some SU pretty in pink to his ears, nose and a little on his cheek.  I used Crystal effects on his eyes and on the tops of the acorns…he reminds me of Puss in Boots from Shrek- don’t you think? 

You should really go check out The Character Cafe, they have so many images for so many occasions, and they’re a lot of fun to colour.  You might be seeing a lot of them around here very soon…*hint hint nudge nudge*…

Don’t forget to check out Twilighttuesday.com for the weekly challenges and all around good fun!

Happy Sunday!

Ciao for now,


*edited to add*…I found out my birthday card also qualifies for the Sissy Scrap Birthday card challenge! whohoo!!

Friday, June 12, 2009

Foto Friday #18; On the vine; Valdagno, Italy


My great aunt’s house in Valdagno, Italy.

DSC05003


DSC05009

Happy Friday!

Ciao for now,

Wednesday, June 10, 2009

Yay for ScrappinGreatDeals Garage sale!

If you’ve been blog hopping to any London-area blogs, you may have heard about the ScrappinGreatDeals garage sale.  It was the first of it’s kind and I’ve heard it was a total success!  Everyone who wanted to participate purchased a box, priced their scrappy stuff how they wanted and the wonderful ladies at SGDs sold it for us!

It was a chance to clean out what I don’t use and offer it up to a better home.  I stayed far away because I knew that there was a possibility that I would accumulate as much stuff as I was trying to get rid of!

Whatever you sold was transferred into a SGD gift certificate; what’s left over, or wasn’t sold and not picked up, is being donated to local schools, clever eh?

I went today to see how well I did, with my gift certificate purchase already lined up.  I was really happy with the results, and donated just under $7 worth of stuff that didn’t sell, mostly some stamps.

So what did I bring home?

DSC08164

Yay for Scor-Pal!! I have wanted one of these for soooooooo long, but they were hard to find here in Canada, shipping it from the US was mucho costly, and then when I found SGD, there was just always something else on my list I needed more.  I had enough from my garage sale proceeds to buy the Scor-Pal and I threw in the Mat for myself for a job well done ;).  I’m very excited to use this tool and I have a million ideas swimming around in my head right now.

I won’t be using it tonight, however…I’m wiped out from my concert last night (Dave Matthews Band totally brought down the house…the first outdoor concert of the summer, what could be better?)

Tomorrow and Friday I’m on the road all day for work, so I’m not sure if I’ll get to use this before Saturday…but I’m hoping to coincide it with a new product and a big launch for my Esty store :)

I also want to take a minute to thank everyone who’s left me comments, overall and in the past few days on my custom order cards and envelopes.  It’s very surreal for me to think that I have my own business and that someone out there wants to buy my work and appreciates it.  I never never thought this would happen.

Thank you all so much for your kind words and encouragement. I am truly blessed.

Happy Wednesday!

Ciao for now,

Tuesday, June 9, 2009

Tutorial- Envelopes for oversize cards

After I posted my progress on my custom order yesterday (see previous post), Tonya asked how I was going to make the envelopes, so I thought I’d share.

I made these ones differently than my 3x3 envies, but you could use that method and just increase the size.

The cards when finished were 8”x8”;  I used MS paper which is 18”x18”.  Because I can’t cut a straight line to save my life, and my paper cutter can only accommodate up to 14” paper, I folded the 18”x18” paper in half and then cut my 8”x8” card. 

Which means I had a 9”x9” piece left, for each card.  Capish?

Forgive me with the pictures,  I started snapping pics when I had already finished one step.

1) Cut away 1/4 to 1/2 inch from each side on ONE side of the paper.  This part will become the back of the envelope; you’re doing this so the tabs that you make on the front of the envelope are on the inside the envelope looks seamless. 

In my picture (you’re looking at the inside of the envie), the top half above the fold is the front of the envie, below the fold is the back.  The paper below the fold is now 8.5” wide and the part above the fold is still the original 9” wide.

DSC08156

2) I fold up the bottom part, and use my bone folder to score along the edges so the tabs will fold nicely and inline with my bottom piece. 


3) Because this paper was 9x9 to start with, I used the burgundy card stock from the card to make the flap of the envelope.  If you have a long enough piece of paper for your envelope, just score another fold 3” from the top to make the flap. 

Still with me?

4) Fold the side tabs over, but DO NOT GLUE to the front of the envelope.  These will be glued to the back of the envelope only, so it can expand when you put the card in.  Yes, I’ve learned the hard way.

5) Fold the bottom to the top and glue to the tabs.

If you want the envelope to tie with a ribbon, follow the next steps.  The other option is to use an Xacto knife and cut a small slit to tuck the flap in to seal the envelope.

6) Use your Big Bite orDSC08158 Cropodile and punch a hole in the BACK of the envelope.  I like doing this part when the envelope is all together because you can judge where the hole should be.

You want the hole below were the flap is going to be so that the ribbon will tie flat, but not too far down that it will be hard to thread the ribbon through the INSIDE.

DSC08159 7) Insert Eyelet


DSC08161

8) Thread ribbon through the inside and glue to the flap; I used ribbon glue here, it’s still wet, but it will dry clear.  Tombo runner adhesive also does well for this.


DSC08162

9) Tie ribbon to close flap and ‘seal’ envelope.


DSC08163Add label to the front of the envelope (and decorate if you want) and voila!  Handmade envies for oversize cards.

I think you can use this method for any size, just make sure you have 3-4” for the flap, and use paper at least 1/2” – 1” wider than your card.

If all of this is clear as mud, email me at “apaperbuffet@rogers.com” and I can explain it again:)

I’m going to a concert tonight in Toronto and will be back tomorrow, and I promise! I will be playing in the Twilighttuesday.com challenge, I have a million cards to make for all the summer birthdays, etc.

Happy Tuesday,

Ciao for now,

Monday, June 8, 2009

Custom Order progress- 2 Bridal Shower cards

I mentioned yesterday I had an order from a wonderful customer in Phoenix, AZ.  Natalie of TerraSense asked for two cards for a double bridal shower.  She asked that they be larger than normal cards since there would be many people who would be signing them.

I decided on an 8”X8” size so that there would be lots of room to write, and picked up some MS paper that was 18”X18”, so I could fold the paper to the correct size.

Natalie told me a little about each bride.  Bride #1 is getting married in wine country, Sonoma, California and her wedding colour is Burgundy.  I found this awesome paper that reminded me of a sunset and I thought it was perfect.

Sonoma1 


I used the main image from SU’s “To Have and to Hold”.  I added the wine glass stamp from the same set given the wedding’s vineyard theme.


Sonoma3

For the inside, I used the Rock and Roll technique, using SU Pumpkin Pie and Really Rust, with the Fifth Ave Floral rose stamp.  I stamped off to make the image a little lighter so people can write their message and it won’t be so distracting.

Sonoma5

Bride # 2 is getting married in Oregon, on her horse ranch, and her colours are green and purple.   I wanted this card to be fresh and bright, and the MS fern DP I found was perfect!  Again the card base is MS 18”x18” paper, cut down to 8”x8”.

Oregon1

I wanted to have a different layout, to make each card unique.

I used the same main image, and in the Sonoma card I heat embossed with translucent embossing powder to give it a little something extra.

I used SU certainly celery ribbon, my favourite MS border punch, Nesties and some paper flowers and rhinestone brads.

For the inside of this card, we wanted to incorporate the horses, Oregon3 so a little horse in each corner with lots of room for everyone to write their well wishes and wisdom to the bride –to-be.


I just have to finish making the envelopes, I’ll use the rest of the 18”by 18” paper and then I’m off to the post office to get these on their way to Phoenix!

I’m really happy with how they turned out, and I think they’ve almost turned into a mini album, which should be a very nice memento for the brides to keep.

Go check out Nat’s store TerraSense…I just ordered some of her organic lip balm and I can’t wait to get it in the mail!

Happy Monday!

Ciao for now,

Sunday, June 7, 2009

A Birthday card inspired by…towels?

One of my best friends celebrated a significant birthday this weekend, and we’re celebrating by going to a concert on Tuesday night.  We’ll be seeing Dave Matthews and his band play at the Molson Amphitheatre; right now there’s a 70% of rain, but only 1mm, so fingers crossed we don’t get drenched!

She also just bought her first condo, so as part of her birthday/housewarming gift I bought her some towels in her favourite colours and used that as my base for her card.

Ardisbday1

I followed the pattern on the paper and pierced it according to the design.  This is the first time I’ve done that and I’m happy with the way it turned out.  I used the sketch from the 2sketches4you site; I missed the midnight deadline, but decided to play anyways.


The card base is chocolate chip, Ardisbday2 I used some Kraft paper for the layering, my favourite MS border punch and my trusty Nesties labels.  Stamp and sentiment are both SU birthday whimsy; I stamped an extra present and added some dimensionals- you can see it a bit in this picture.  I used SU Chocolate Chip taffeta ribbon and added some bling…I thought at first I went a little overboard, but you can never have too much icing!

I still have to decorate the inside of the card, wrap up an Etsy order and today I received a RUSH custom order for a wonderful customer in Phoenix, AZ.  I’ll be making 2 8X8 bridal shower cards, and I’m really excited about them.  I’ll be sure to post when I’m done, they need to be in AZ by next Wed, so my catch up on TwilightTuesday.com challenges needs to be sidelined again:(  Poor Twilight. ;)

Happy Sunday!

Ciao for now,


Saturday, June 6, 2009

I’M GOING TO THE OLYMPICS!

This weekend was supposed to be to catch up on making cards, but I can’t sit still because I just got tickets to the Vancouver 2010 Winter Olympics!!!!

My friend Hillary and I have been talking about this since it was announced Vancouver will be hosting the Winter Olympics.  We missed the first round of ticket purchases in November, it was just after my surgery and we both forgot.  They announced they would have another round in early 2009…which turned into today, June 6th, 2009.

I thought it was a long shot, but I opened 3 browsers and was in the Virtual Waiting rooms for about 30 minutes when all of a sudden it brought me to a registration page!  Ok, breathe, fill out the info. 

Onto the ticket page.  Ok, I bet only Luge and curling are left…so what did we get tickets for?

That’s right Canadian Women’s Hockey!!

We’ll see them play Sweden in the preliminary rounds on Wed February 17th, 2010.


But that’s not all!  I thought, ok, lets see what else is out there…


That’s right! we’re also seeing the Canadian Men’s Hockey team play Switzerland on Thursday Feb 18th in the preliminary rounds!!

This is honestly one of my biggest dreams come true! I’m so excited, I haven’t stopped smiling all day and I can’t possibly sit still!!

The Olympics have a special place in my heart- I stay up day and night watching them and cheering our National teams on.  My uncle is a 2-time Olympian (Canadian National Basketball team), my friends are Paralympians (swimming) and many of my professors in University were on Olympic training teams.  In fact, one of the reasons why I went to UWO was because it’s the only Olympic affiliated University in Canada.

I can not believe how blessed I am to  be able to have the opportunity to  cheer for our Canadian men and women, on home soil and while playing one of our National games.

Now I have to wait until February 2010.


HAPPY SATURDAY!!

Ciao for now,


Twitter Delicious Facebook Digg Stumbleupon Favorites More
This Is A Do-Follow Blog