Dress up your door

Yarn Wreath Tutorial.

Crumb Cake

Who would've thought?

Coconut Sugar Scrub

A simple, yet luxurious gift. Don't forget to make one for yourself!

Monday, December 20, 2010

Happy Holidays from A Paper Buffet

Just a quick note to say thank you to everyone for a great year. I've closed both stores until January 3rd 2011.

I'll be taking a vacation to New York City until the 22nd and then be travelling to my home town to spend the holidays with friends and family.

I have some great ideas for the stores for next year and I hope you'll join me and celebrate the growth of A Paper Buffet.

I hope to bring back "Foto Fridays" on a regular basis.I'll have plenty of pictures just from this NYC trip I'm sure!

Merry Christmas and Happy New Year. All the best to you and your family for 2011.

Ciao for now,
Published with Blogger-droid v1.6.5

Sunday, December 12, 2010

A week in review- in pictures

Sunday December 5th, Craft show at the lovely  Auberge du Petit Prince here in London.

Sunday December 5th-Wednesday December 8th- we got hit with a giant snowstorm that gave us more snow in three days than we got all of last year!

Snowbank or SUV? perspective

Friday, December 10th- I got a rockin’ new hair do:


Saturday, December 11th- I participated in An Artists Affair- my best show ever! I had so much fun, nearly sold out and met some wonderful people- customers and vendors alike!

What a great week!

I’ve got some custom orders to work on, my own Christmas cards to make and I’m counting down to my trip to New York City- only 6 days!

Happy Sunday,

Ciao for now,

Wednesday, December 1, 2010

Who stole the cookie from the cookie jar?

who me? yes you! not me! then who?


Sorry, I’ve had that song in my head since I’ve made these cookies in a jar as gifts this year.  I always like to give something handmade when I can and these were perfect for my boss, my massage therapist and my hair stylist.


I saved some Mason jars from my  Dad’s homemade pickles (yum) and   bookmarked this blog post from Tip Junkie listing 48 ways to give gifts in a jar.  48 ways!!! (I will think of someone I can give pie in a jar to because who wouldn’t love pie in a jar???)

The recipe for these cookies are actually Cowboy Cookies by Bakerella- click on Idea #20 on the Tip Junkie post. 

*Sidebar- Check out #37, Bakerella’s Coca Cola Snowglobe cupcakes which are too freaken cool for words*

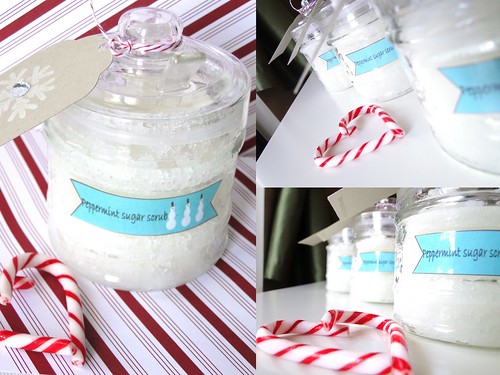
Truth be told, I really wanted to make Christmas Cookie tags, with a stamp I have from Clear Dollar Stamps, and this was perfect motivation.

I used my Nesties to create all the circles and stamped the sentiment in SU Chocolate Chip ink on SU Whisper White cardstock.  I layered SU Cherry Cobbler and Chocolate Chip, punched a hole, added some Martha Stewart baker’s twine, a gingerbread man from the best paper punch I own, and c’est finis!


{Every time I make one of these guys I think of “Not my gumdrop buttons!” from Shrek.}


I added the Gingerbread man, drew on some squiggles, buttons and a smiley face with a white gel pen and was finished the tag.


Now, back to the jar.  When Bakerella tells you to pack the ingredients tight or they won’t fit, she means it!  I had no idea what to use, so first I tried one of the beaters from my mixer, but it didn’t work so well.  Then I tried an ice cream scoop, but the angle wasn’t right for the jar.

Finally I found a digital thermometer which was flat topped, like this one, it worked perfectly!   I also would recommend using a funnel for the main ingredients, it made things easier.

I bought some fun Christmas fabric on my way home from work, sewed the edges on my tiny $20 sewing machine and wrapped some baker’s twine around the lids.

I love how they turned out, I love all the layers and the little bit of pecans peeking out

I gave my boss her cookies today and she was thrilled, it’s such a good feeling when you can give someone a gift like this.

If you’d like to make your own cookies in a jar, I have some tags in my Etsy store now.

Happy Baking!

Ciao for now,

Monday, November 29, 2010

Weekend Catch up

Just a quick post to play catchup with what has been happening here at A Paper Buffet.I had my first cratf show of the season this past Saturday. With three show three weekends in a row, I've been spending a lot of time getting ready. This first show was at London Jazzercise. There were only 5 vendors and I was the only one who had handmade items. The rest were sales reps for their respective companies- jewelry, bath and skin care, gourmet food and handbags.

Here my table setup: it turned out pretty well considering. I though I wouldn't have enough stock to fill the table when really I ran out of room!
I did really well considsring the show was very small. Actually I was the only one who sold anything!

Next weekend is the biggest show I'm in so I'm trying to make some more stock. I'm also going to make some birthday cards as I sold out of those too.

Happy Monday!

Ciao for now,
Published with Blogger-droid v1.6.5

Wednesday, November 24, 2010

Shipping tags never looked so good!

Just a quick post to show you some gift tags I’ve added to the stores made from shipping tags.

I bought mailing tags from Staples months ago, always with the intention of making tags, but they got pushed to the back of the shelf and forgotten.

Inspired by my lovely stack of Me and My Big Ideas Christmas paper, I created these snowman tags.

I covered the tags in the paper and added these felt snowflakes.  If you look at the Holiday section of my Etsy store, you can see how much I love these snowflakes!

The snowman stamp is a small clear stamp I acquired 5 years ago when I started seriously stamping, it was the perfect size for the lable Nestie.  I added some teal ribbon and voila!


I love how they turned out, so I made another set with some other of the sparkly paper from Me and My Big Ideas Christmas stack.

  The red and blue tags are striking!  I’ve never used the red and blue combination before, but after I made these tags, I made a card using this paper and it turned out fabulous! (*I’ll be showing that one to you very soon!)

I told you I loved those felt snowflakes!


I also created some vintage-feeling tags.  I distressed these tags with Tim Holtz  Brushed Corduroy ink and am very happy with how they turned out. 

The Christmas tree stamp from Stampin’ Up had the perfect look, and I added some brown embroidery floss instead of ribbon.

The picture shows the ink with a tinge of green, but it’s more brown IRL.

I loved the way the Christmas Tree tags looked, so I found my reindeer stamp and made some more vintage-looking tags.

The Reindeer tags turned out really well! I used the same distressing ink and embroidery floss instead of ribbon.

I like to wrap all my gifts in the same paper- I think I’m going to wrap in Kraft paper and use these tags- what do you think?


Happy Wednesday!

Ciao for now,

Thursday, November 18, 2010

I love to hate paper piercing

I love the look of sewing on a card, it seems to add a little somethin’ –somethin’ if you know what I mean.  So I bought a tiny, cheap sewing machine that I use for straight stitches on cards. 

Of course, now I want to use zig-zag stitches on my cards because it adds more somethin’-somethin’ and my tiny, cheap sewing machine isn’t capable of that.

Paper piercing mimics sewn stitches, when you use a pen to connect the dots, more or less. It can look great, but it is time consuming!  I went a little overboard with this card, but I think the overall effect is worth it.

By using a white gel pen, I can mimic the look of stitches.  I also chose to punish myself and paper pierce each panel.  I also love to hate panels.


Here’s a closer look:

Not only did I pierce each panel….I pierced the scallops on the circle and the ribbon mat:


I think this card has a ‘Country Christmas’ feel to it with all that stitching.

This card is available in my Etsy shop

What’s the technique you love to hate?

Happy Thursday!

Ciao for now,

Tuesday, November 16, 2010

Treasury Tuesday- Latte Love

I was inspired by my Latte Love Gift Set to create a new treasury on Etsy.  I forgot how much I loved making treasuries, looking for new items and shops, and I found some beautiful work.

Click the picture to be taken to the actual treasury.

Latte Love screen shot


I just love all the different shades of brown, and I’m dying to try those coffee marshmallows and caramels…YUM!

Happy Tuesday!

Ciao for now,

Monday, November 15, 2010

Latte Love gift set is back!


A very popular item last year, I’ve brought back the Latte Love gift set for the holidays.  This gift set is perfect for the hard-to-buy-for person on your list.

Just slip a gift card to your favourite coffee shop in the gift card and the gift is complete!


The gift set fits well within most gift-exchange budgets, and is a lot more fun than handing over a gift card in a plain envelope.

Each Latte Love gift set includes a handknit coffee sleeve, and a coffee-themed gift card holder to co-ordinate.

I love knitting up the coffee sleeves; they’re a quick project and let me play with different (albeit simple) stitch combinations.

I sold out last year, so I’m in the midst of knitting more sleeves- any colour requests?

I love knitting the chocolate brown, I think it’s perfect just in case any leaks occur.  Purple and pink were also a popular colour last year, so I’ll be bringing those back again.

You can buy your Latte Love gift set in my Etsy store, and I love custom orders, so if you have a favourite colour in mind, let me know!

Happy Monday!

Ciao for now,

Wednesday, November 10, 2010

Shabby Chic Season’s greetings

Often I’ll look at card magazines and use sketches for inspiration.  I try not to make the same card over and over and over again (unless it’s the baby card, then I just can’t help my self).  As soon as I spotted this card in the Stampin Up catalogue, I knew I had to try it.

Kraft paper is my all-time favourite card base, it really works with any colour combination.  I will find any excuse to use it. Much to my dismay, SU decided to discontinue the Kraft colour and replace it with Crumb Cake, which is similar, but not the same.  Oh well.

I stamped the Tree image on Whisper White and used some Chocolate chip punched with my border punch for the left edge.  All the edges were distressed with my Tim Holtz distressing tool.

I love the distressed look and have been trying to use the technique more often.  I’ve used one of my all-time favourite stamp sets- Snow Swirled.  The tree just looks fantastic heat embossed- check out last year’s Christmas card with the same tree.

The ribbon is actually 2” wide (or maybe more) but I cut it in half, then pulled some threads.  I often forget to use this ribbon because it’s so big and thick; if you tie it in a bow or knot, it’d be hard to mail the card with one stamp.  I folded the ribbon to give the pleats and held it down with Scor-Tape- that stuff is good for everything!

A few adhesive rhinestones (you can never have too much bling); a button, eh voila!

You can find this card in my Etsy store and I’ll be sharing, and listing, some more Christmas items this week.


Happy Wednesday!

Ciao for now,

Monday, November 8, 2010

A Week (or two) in review


Hello strangers! It’s been a busy few weeks in the A Paper Buffet workshop.

Two weeks ago I sent off the Turkey Thanksgiving cards to California where they were very well received!

Here’s a few photos of the finished cards:

Individual cards: Base is SU Kraft, with Pumpkin Pie and chocolate chip. The sentiment as well as the Turkey is from Wildflower Kids  Stamps and were printed on SU Very Vanillan and coloured with prisma pencils

all 3o cards stacked!


Wrapped up and ready to go!


I also finished the other big Thanksgiving order for 100 Pilgrim place cards.  These place cards also use Wildflower Kids Stamps, Violet and Rye.

   My little pilgrim army!


Here are some close-up shots:


These were a lot of work, each pilgrim was hand coloured, then cut and adhered to hand cut cards.  The cards were distressed with red and orange ink, then a maple leaf was stamped on the corner.

I’m so pleased with how these turned out; they were shipped out to New York State last week and should be arriving soon.  These will be used for a company holiday party, and I can’t wait to see how they look on the tables!

I had a productive weekend and will be adding new Christmas items this week.  I’ve also signed up for a few holiday Craft show, so I’m in full production mode.


Happy Monday!

Ciao for now,

Friday, October 22, 2010

Gobble Gobble: Colouring 60 Turkeys with Prismas and OMS

I used to avoid stamped images that required a lot of colouring.  Although my kindergarten skills were sharp and I could colour within the lines, I could never get the shading and smoothness I had seen on, (or what felt like), everyone else’s cards.    I certainly felt there was no way I could colour with Copic markers, even though the effect is incredible.

Through several blog hops and tutorial posts, I discovered the  problems: I wasn’t using Prisma pencils (artists pencil crayons) and I wasn’t using Odourless Mineral Spirits (Gamsol).

When used with a colouring stub, nib, or whatever they’re called, the OMS blends the colour producing shading and a very smooth appearance.

To start, I outline the image, that way I can pull the colour in and have more shading around the edges.  It’s also great because this step doesn’t have to be exact- which is good when you’re colouring 60 turkeys!


I know there’s not going to be enough colour just from the edges, so I lightly colour in the body and each feather.  As you can see, the colouring isn’t even from the pencil crayon.  I remember in grade school, we shaved the pencil crayon with the edge of a scissor, then used a tissue to make the colour even and blended.  The OMS does the same thing, but is much easier, and more precise then shaving the pencil crayon with a scissor edge.


Now the colour is evenly blended and I have some depth of colour. 


Makes a huge difference, doesn’t it!?

I did the same thing with the “Thankful”; outlining the edges, then pulled the colour in with OMS


While I’m still no where near anything that Jen or Donna colours, or will be graduating to Copic markers any time soon, this has helped tremendously!

Try it out!

Happy Friday,

Ciao for now,

Friday, October 15, 2010

Paper Cuts

SThankful4witching gears from Christmas, I received a custom order request for a customer in California for some Thanksgiving cards.   My customer told me she sends a Turkey Thanksgiving card out every year, and she thought my card was too cute to pass up.


How fun would it be to receive a turkey card every year!

Now that the baby boxes are finished (and of course I forgot to take a picture before I packed them up and delivered them), I can start this Thanksgiving order.

DSC04844

DSC04845


I’ve cut all the paper for the cards.  I don’t know what it is, but I love the stacks of paper.  Maybe because it’s the only thing that’s organized on my dining room work table!

The turkey image is from Wild Flower Kids Stamp Autumn release from last year when I was lucky enough to be on their design team.  I love Jen’s images, they are super cute and lots of fun to colour.

Next will be the assembly and the colouring of the turkeys.  For 30 cards, I’ll colour 60 turkeys…as you can see from the picture of the finished turkey, the head and body have been cut out and popped up for dimension.  It’s a lot of work, but the effect is worth it.

Stay tuned for more progress reports and another! big Thanksgiving order featuring another one of Jen’s Wild Flower Kids digital stamps.

Happy Friday!

Ciao for now,

Tuesday, October 5, 2010

Christmas Sneak Peak- Day #9; Release day is tomorrow!

Here’s your final puzzle piece, thanks for playing along!

I have to admit, this paper does remind me of Minnie Mouse…

We’ll see you tomorrow when these Christmas items are released at my Etsy shop and at A Paper Buffet.com.

Happy Tuesday!

Monday, October 4, 2010

Christmas Sneak Peek- Day #8

We’re getting so close!

I just can’t get enough of that Olive green and Chocolate Brown combination.

Only one more day of previews and then Christmas items will be available at A Paper Buffet.com and my Etsy store.

Happy Monday!

Sunday, October 3, 2010

Christmas Sneak Peek- Day #7

Almost at release day!

Puzzle piece number 7 is…

Red and green, always a classic combination.

Happy Sunday!

Saturday, October 2, 2010

Christmas Sneak Peek- Day #6

We’re almost there!  Here’s your next puzzle piece.

Another SU favourite- Certainly Celery.  Another snowflake perhaps?

Happy Saturday!

(p.s. I’m at home for a friend’s wedding, I’m a bridesmaid- pray to the weather gods that it’s not really cold and/or rainy, we’re having pictures outside!)

Friday, October 1, 2010

Christmas Sneak Peak- Day #5

Here you go!


This project features some very special paper that I brought home for a trip…this paper has travelled! Can you guess where it’s from?

Happy Friday!

Thursday, September 30, 2010

Christmas Sneak Peek- Day #4

Enough chatter, you know what this is about by now :)


Without intention, it seems there’s a lot of snowflakes and rhinestones in my work this Christmas…bring on the bling!

Happy Thursday!

Wednesday, September 29, 2010

Christmas Sneak Peak- Day #3

Ready for another puzzle piece?  Here you go!

My favourite Bo Bunny paper from last year…I managed to save a few extra pieces. 

Happy Wednesday!

Technorati Tags: ,

Tuesday, September 28, 2010

Christmas Sneak Peak- Day #2


Here’s your next puzzle piece for a different Christmas item that will be released next week.


Happy Tuesday!

Monday, September 27, 2010

Christmas Sneak Peak- Day #1

To get ready for the release of the first of my 2010 Christmas products, I’ll be posting a puzzle piece each day of a different Christmas item.

Sneak Peaks will happen for the next 9 days to prepare for the release next week. 

Here’s your first peak and puzzle piece!


Ahh, my favourite SU colour, Old Olive!

Happy Monday!

Ciao for now,

Friday, September 24, 2010

Pitter Patter

No big announcements, just a custom order :)


DSC04726

I’m working on an order of 55 mini boxes for my dad’s cousin’s daughter’s baby shower.  If you understood that, it means my third cousin.  She might be once removed, but I’m not sure.

We don’t know if the baby is a boy or a girl, so we’re doing half of each.  The boxes are all made, and now the stamping is done.

Just a scalloped circle to cut out, in pink and blue for each box, add the ribbon and I’ll be done.

I’ll keep you posted on the progress, and this weekend I’m hoping to start some Christmas cards, and work on some more of the custom orders I have.

Happy Friday!

Ciao for now,

Twitter Delicious Facebook Digg Stumbleupon Favorites More
This Is A Do-Follow Blog