Dress up your door

Yarn Wreath Tutorial.

Crumb Cake

Who would've thought?

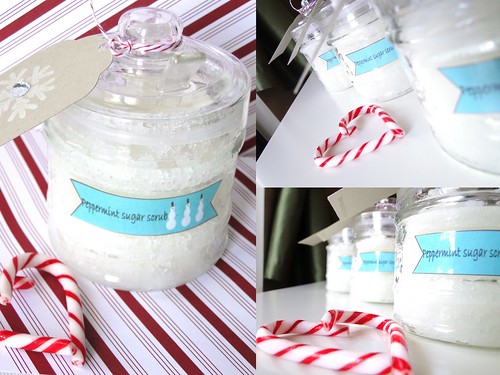
Coconut Sugar Scrub

A simple, yet luxurious gift. Don't forget to make one for yourself!

Friday, November 11, 2011

Lest We Forget

In Flanders fields the poppies blow
Between the crosses, row on row,
That mark our place: and in the sky
The larks still bravely singing fly
Scarce heard amid the guns below.

We are the dead: Short days ago,
We lived, felt dawn, saw sunset glow,
Loved and were loved: and now we lie
In Flanders fields!

Take up our quarrel with the foe
To you, from failing hands, we throw
The torch: be yours to hold it high
If ye break faith with us who die,
We shall not sleep, though poppies grow
In Flanders fields

Composed at the battlefront on May 3, 1915
during the second battle of Ypres, Belgium, by Lieutenant Colonel John McCrae


Never again.

Thursday, November 10, 2011

Vintage Christmas- part 3

This might be one of my favourite cards so far; and it came about by accident!  I had cut the background paper, punched the red edge and attached the red ribbon and then…hit the creative wall.  The card I had planned out, just wasn’t working anymore.  I tried a number of different images, sentiments, but nothing was working.  I put the card away for a night and decided to come back to it later.

I looked over my craft table and saw a scrap of the Authentique Christmas paper tucked under my paper cutter.  This little group of birds was staring back at me…eureka!  It was perfect! The answer to saving the card wasn’t a stamp at all…it was patterned paper!

I cut out the birds with my oval nestibilities, and added a cherry cobbler mat oval and it became the focus point of the front of the card. 

The inside of the card used coordinated paper, with a lace punched old olive paper. 

This card is a bit vintage, and for some reason I feel the bird image makes it a bit country/shabby chic.  For a card that didn’t come together as I had envisioned, I’m thrilled with how it turned out.  Some times you just have to let the creative process completely take over.


  I’ve added this card to the A Paper Buffet Etsy shop .  I’ll have more cards to share with you from this paper collection soon!


Happy Thursday!


Wednesday, November 9, 2011

Vintage Christmas- part 2

Here’s another card with no stamping on the outside.  Another vintage Christmas cards using Authentique Christmas “Wonder” paper.  I just love this snowman!

I added a different stitch (and did it by hand…I must be crazy!) to the border to add some texture.  I used the cherry cobbler for the base, with a black mat and black stitching.

There’s not much more I can say about this card- I think it speaks for itself.  The collage paper is absolutely gorgeous, I can’t wait to show you more from this line.

I added more to the inside of the card again, using more patterned paper and distressing all of the edges.

  I’ve listed this card in the A Paper Buffet Etsy shop and I have some more vintage themed cards to show you, so stay tuned!

Happy Wednesday!


Tuesday, November 8, 2011

Vintage Christmas; part 1

Surprisingly, there’s no stamping on the outside of these cards.  I recently bought some gorgeous Christmas paper (Wonder by Authentique) and I just couldn’t bare to cover it up with stamped images. 

This paper has a very vintage theme, which isn’t something I normally work with, but I couldn’t resist this paper.  I added hand stitching to the border of the card to add some interest since I was using the paper as the main image.  I was most happy about using black and red, what an impact it has!


I just love this old vintage Santa image, and the postmark just adds to it.  I decided to dress up the inside of the card since the outside didn’t have anything extra


I added some more of the Authentique paper, and a border of green cardstock, punched with a lace punch.


The card base is cherry cobbler and I used some black paper for the matting.  The inside panel is more black with a

very vanilla panel. 


I’ve listed this in the A Paper Buffet Etsy shop  and I’ll be back tomorrow with another vintage Christmas card.


Happy Tuesday!


Monday, November 7, 2011

Coffee mug gift boxes

  Are you ready for some cuteness?  I am so happy to be finally sharing these with you.  I’ve made some cute new gift boxes that are shaped like coffee mugs! 
Just in time for the holidays and perfect for teacher’s gifts, the office gift-exchange or that hard-to-buy for person on your Christmas list.

I’ve been working over the past few weeks trying to figure out how to ship these, in a manner that won’t cost you your first born child.  Shipping is very expensive here in Canada; funny enough, it’s cheaper for me to ship something to the U.S. than it is to ship within Canada!

I’ve decided, due to the cost of shipping, to sell these paper mugs in sets of two.   You can gift these as a set, or individually. 

Aren’t they adorable!  Each mug is 3” high and has a diameter of almost 2.75”.  You can fit a package of hot chocolate and some marshmallows, or some little cookies inside.


   These will be perfect filled with little goodies; I’d wrap some clear or Christmas cellophane around the whole mug and tie it with some ribbon.  It’d be so sweet!


I’ve made these mugs in three colours, and they’re available in the A Paper Buffet Etsy shop 


You’ve already seen the green set, so here is the blue:


and red:

I can’t decide which one I like the most- they are so cute!


What would you put inside your paper coffee mug gift boxes?  Chime in below!


Happy Monday!


Thursday, November 3, 2011

Thank you card

I bought some mini shipping tags months ago, and completely forgot about them.  I needed to make a thank you card, and thought the mini tag would be the perfect way to stamp the sentiment.  I used some of that great Simple Stories Elementary paper that I used for these birthday cards and a simple layout.  I just love this paper, and the slightly distressed look;  I distressed the tag using some SU Crumb Cake ink to compliment the DP.


The card base is SU Very Vanilla, and I layered Cherry Cobbler paper for the matting.  I love the deep colour of the Cherry Cobbler paper.  I added some Cherry Cobbler seam binding ribbon to the tag to tie it all together.  I made the card 5” square- I needed the card for work and 10 people had to sign it, so I wanted to make sure there was enough room.


Happy Thursday!

Tuesday, November 1, 2011

Knit poppy and a penguin sweater

In Canada, November marks Remembrance day, celebrated on November 11th.  We pay tribute to our military personnel, past and present.  We wear poppies on our lapels as a sign of remembrance.  The poppies are pinned on using a small straight pin, and  I often lose many poppies each season. I hate the thought of losing a poppy and having it lay on the ground somewhere.  I think I lose them, in part, because I drive so much and the seat belt often moves the poppy that I wear on my left side.  I was browsing Ravelry and found a pattern for a knit poppy.   I thought this was a great way for me to have a poppy that I wouldn’t lose. The pattern was written by Laura Chau, and she also has it posted on her blog here .  The poppy was my knit flower, and it knit up quite quickly.  I didn’t have any black yarn, so I used some left over dark grey yarn.  I added a few rows to make the poppy larger; the grey yarn was double the thickness of the red yarn, and I wanted to keep the flower proportional to the size of the centre.  I added the following rows:

                           Round 10: Knit
                           Round 11: kfb k2 repeat to end 56 stitches
                           Round 12: Knit
                           Round 13: Knit
                           Round 14: purl
                           Round 15: bind of pwise

I’m happy with how my very first flower came out.  The first few rows are the trickiest; the needles (2.75mm) are very small and I felt like I kept getting tangled in the yarn and the needles.


Poppies are received when you make a donation to the Royal Canadian Legion Poppy fund.  I’ll continue to make a donation when I see the Legion members with their poppy boxes, while wearing my knit poppy.


And now for  a penguin sweater update- it is complete!  I finished knitting and then added the elastic thread on the collar and on the bottom edge as recommended.  I don’t have a stuffed penguin, so I modeled the sweater on my Harrod’s bear.  He looks pretty cute!penguin sweater 2

The penguin sweater is on it’s way to Australia. It might not help this round of penguins (the request went viral and the wildlife centre received an abundance of sweaters), but perhaps some other little animals can put it to good use.


Happy Tuesday!


Twitter Delicious Facebook Digg Stumbleupon Favorites More
This Is A Do-Follow Blog