Dress up your door

Yarn Wreath Tutorial.

Crumb Cake

Who would've thought?

Coconut Sugar Scrub

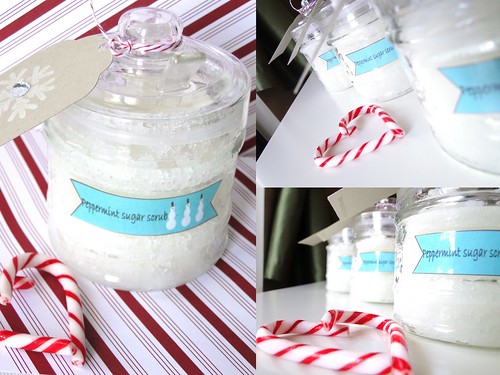
A simple, yet luxurious gift. Don't forget to make one for yourself!

Showing posts with label nestibilities. Show all posts

Tuesday, February 15, 2011

Collaged Nestibility background

I’m a huge fan of Spellbinders Nestibilities.  It’s rare that I make a card without using one die-cut from my growing collection.

I can’t recall where I saw this idea, but it’s stuck with me and I finally had the chance to try it out.

I used scraps of paper left over from the Love edition pillow boxes I made for my Etsy shop , and arranged/adhered them on a piece of cardstock.  Then I used one of my Nestibilities to cut out the collage, and it created a great background for this card.

This is a great way to use up scraps of patterned paper, while creating a unique background or focal point to the card.

I’m already making little piles of scrap paper that work together, so I can make some more collaged background shapes to have on hand.

Go and try it, I’d love to see what you come up with!

Saturday, July 25, 2009

One card, three challenges

I needed some inspiration for a thank you card for a customer, so I started off at Taylor’s Cupcake Challenge to see what the sketch was for this weekend.

Ok, so I had my layout.

Next I needed some colours to work with, so I headed over to the Color Throwdown.  I’ve always wanted to play along, but until last week, I never had all SU cardstock ( I mostly used Bazzil), so this is my first time playing along.

Colours for this week are:


Add one more challenge, found while blog hopping; There She Goes August release challenge 13- Wings and Things.

So, put them all together and what do you get…

ColorThrowdown copy

ColorThrowdown2 copy

I even remembered to finish the inside of the card!

ColorThrowdown3 copy

I used SU Chocolate Chip for the base, layered with Certainly Celery and the DP is Martha Stewart.  I used my nesties to cut circles out of Perfect Plum and inked up my new Hero Arts butterfly stamp in matching ink.  A nesties tag, with the sentiment stamped in Chocolate Chip and some Chocolate Chip to finish it off.

I’ve got a few more cards to make today, and tomorrow, my Godson Ethan is coming for a visit! Well, his parents are bringing him of course, he’s only 6 months old!

Happy Saturday!

Ciao for now,

Thursday, May 21, 2009

Where did all my stamps and Nestibilities go?

Don’t forget to enter my blog candy giveaway on THIS post!

While renovating my office, I had an opportunity to re-organize my supplies and find a better way to make it work for me.  before9My clear stamps were out of control, being held in an accordion file.  It was difficult to see the stamps, and I had to rely on memory of what company made the stamp I wanted to use.

I went up to ScrappinGreatDeals and was trying to figure out a better way.  One of the ladies there was lovely to help and showed me how she stores her stamps and thought it might work for me, and it does!

I bought stampstorage1some ‘sticky sheets’  that fit in a regular 3 ring binder, and voila!   All the stamps are nicely organized, I just have to make labels for the tabs.  This is a great way to store the un mounted stamps while still allowing you to see all of them.  It was suggested to stamp all the images and then put them in a page stampstorage2protector, but I cheated and used the inserts from the stamp packages themselves, or the backings to the clear stamps in clear page protectors. 


I decided this might be a way for me to store my Nestibilities as well.  I had previously kept my Nesties on a magnetic sheet, but my collection was growing and I was afraid I was losing track of the dies.  So I purchased some plastic binder dividers from Staples ($1.99 for a pack of 5)

nesties1I would recommend using the plastic ones, since the next step is going to make the divider heavy and paper ones may rip.

nesties2I bought some photo magnet sheets at the dollar store.  Since it’s made to turn photos into magnets, one side is sticky and it’s perfect.  Adhere the sticky side of the magnetic sheet to the divider and then…


nesties3


You can keep an entire set of Nesties all together on one page! I used two magnetic sheets per page, and I did have to trip them a bit to fit the divider, but it works perfectly!  This takes up much less space and now I know where everything is.

Have any storage tips? How about a craft room secret? Be sure to enter my blog candy contest by going to THIS post and leaving me a comment :)

Happy Thursday!

Ciao for now,


Sunday, March 22, 2009

A New Look and a TECC birthday card

You may have noticed…a new banner and blog look!

The background is from thecutestblogontheblock, I just picked another background instead of the other Madison Ave look.  But I’m most excited about my new banner.  If you have a peek at my Etsy store, you can see they match now.  The blog banner, Etsy banner and a few other things (business cards, labels and custom order Etsy shopholder) were designed by the wonderful Stacey at Pixel Cafe.  She is an absolute delight to work with, and incredibly patient with someone like me who knows NOTHING about graphic design.

I sent my new business card to the printer yesterday, they should be in this week, I can’t wait to get them back.  I feel like a real business owner now. Once they come in, I’ll share with you :)

I have a few things cookin’ here, but they’re not ready to share yet.

I did manage to finish a card for Taylor’s challenge this week.  I skipped last week, but when I saw this week’s sketch, I knew it would be perfect for some birthday cards I need to make. 

TECC60.1

I had been putting off buying the oval Nesties, but after I saw Taylor’s sketch, I knew I couldn’t put it off any more.  Part of the reason I had waited so long was that Nesties are hard to find up here, I always had to order them from the U.S.  With the dollar being what it is…it’s pricey.  But then! my friend Andrea told me about this wonderful little place- ScrappinGreatDeals.  It’s a 5 minute drive from my house (and you can order online) and has all the Nesties I could ever dream of owning.  She’s got wonderful paper (also used in the card, I just couldn’t resist!) and lots of other fab stuff- which I’ll share later in the week.  So much stuff just hopped in my basket- don’t you hate when that happens? It was begging to come home with me, what could I do?

This was also the first card where I got to do some paper piercing, using my new Mat pack from SU.  What a difference the right template makes!  I had some other templates from another company, but they don’t hold a candle to the SU ones.  I’m pretty happy about the card, and used ribbon from Michaels that I bought nearly 3 years ago and hadn’t used yet!

Well, I have a few errands to do today and my plan is to clean the car-ick. But it’s a beautiful sunny Sunday and it’s got to be done!

Happy Sunday!

Ciao for now,

Twitter Delicious Facebook Digg Stumbleupon Favorites More
This Is A Do-Follow Blog