Dress up your door

Yarn Wreath Tutorial.

Crumb Cake

Who would've thought?

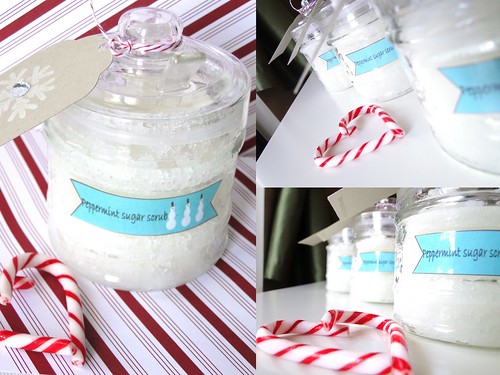
Coconut Sugar Scrub

A simple, yet luxurious gift. Don't forget to make one for yourself!

Showing posts with label organizing. Show all posts

Tuesday, February 1, 2011

Fresh start for February: How to organize your business ideas one day at a time

Balancing an online shop with a full-time job, family, friends and household commitments can be difficult at the best of times.  In addition to creating our products, we have to photograph them, edit them, , write product descriptions, list them, promote them… Then you actually make a sale and an entirely different process plays out…blah, blah, blah.

I get distracted very easily.  Quite often while looking for paper for one card, I find something else that inspires a completely different idea/product/theme, etc.  I have a thousand sticky notes with ideas, sketches, and to-do lists.

Last Christmas season I started using a Whiteboard, mostly to write down all the items I was going to make for 3 craft shows over a course of 3 weekends.  I needed to be organized and I needed to stay focused. 

It worked!

But I started adding monetary goals, timelines, custom orders, and soon there was no “white” left on my “whiteboard” and I wasn’t accomplishing everything on my “To-Do” list.

I needed a more realistic way to stay on track the nights I come home from work, too tired to do anything.  I was haunted by my whiteboard.

Then it hit me, I needed something smaller. Something that would force me to keep my list of ideas and tasks in line with the amount of time I have during the week (slim-to-none).

I created an Idea Calendar.  A small (6x6”) calendar, attached to some cardstock to keep by my computer.

I sewed the pages so that I could tear them off easily each month, and I have a space to record new ideas on the right hand side.


The squares are small. Too small you say? No way-- there’s a method to my madness. I can only write one task in these squares, which means I’m more likely to accomplish one task each day and not be overwhelmed or haunted by my list. 

I can write an idea down when it occurs, and schedule it for an empty day. 

This means I’m 1) less likely to forget the idea 2) and more likely to accomplish it.

{Can you tell Blogging is something I 1) forget to do and 2) don’t accomplish on a regular basis? Winking smile}

This may or may not work for you, but I’m going to give this a real shot.  Today is February 1st and it’s a fresh start.

You can create your  own calendar and customize it to what suits you.

I didn’t want to turn this into a spammy promotional post, but if you’re interested in one of these calendars, I can put them together pretty fast, and can list them for sale.  Nothing fancy or covered in rhinestones, just simple and straightforward.  Leave a comment, email or send me a convo from my Etsy shop.

If you have any other ideas for organizing and finding balance between your online shop and ‘real life’, let me know!

Happy Tuesday!

Ciao for now,

Wednesday, August 18, 2010

It feels good to be organized.

I’ve got a million things on the go…or at least that’s what it feels like.  We’re revamping A Paper Buffet.com to make it easier for customers, I’m editing photos and listing over 200 mini envelopes in my Etsy store, I need to start making Christmas cards, (and actually make MINE this year), yadda yadda yadda.

You get it, right?

And each and every time I walk into my living room, my eye is drawn to the 3 canvas bags and one plastic shopping bag full of wool. Ugh. I keep saying I’m going to do something to organize it, but yet it goes untouched for months. 

I added to the pile a few months ago when my Nonna (Italian for Grandmother) gave me more wool, (and gorgeous stuff from Italy) because she’s not knitting any more (there was a subtle hint that if she had grandchildren to knit for…).

When I went home a couple of weeks ago to go to the cottage, my mom asked me to clean out my closet and let her know what she could give-away/throw out.  Low and behold, I have 3 wicker baskets, just sitting and begging to be used.  I put the biggest one aside to make sure I remembered to bring it home.

The basket I chose had a cotton liner, I washed and dried it and was ready to organize!  After 45 minutes of stretching the damn liner back onto the basket (yes, I even washed it by hand, in cold water so it wouldn’t shrink!), I was finally ready to organize all that wool.

I organized by colour, as best as I could, and still didn’t fit all the small half skeins I have, that’ll have to wait until I go home again and pick up another basket.

It feels really good to have this looking much cleaner and presentable in the living room. 

Now if only organizing the wool into the basket gave me time to actually play with it…

Ciao for now,

Thursday, May 21, 2009

Where did all my stamps and Nestibilities go?

Don’t forget to enter my blog candy giveaway on THIS post!

While renovating my office, I had an opportunity to re-organize my supplies and find a better way to make it work for me.  before9My clear stamps were out of control, being held in an accordion file.  It was difficult to see the stamps, and I had to rely on memory of what company made the stamp I wanted to use.

I went up to ScrappinGreatDeals and was trying to figure out a better way.  One of the ladies there was lovely to help and showed me how she stores her stamps and thought it might work for me, and it does!

I bought stampstorage1some ‘sticky sheets’  that fit in a regular 3 ring binder, and voila!   All the stamps are nicely organized, I just have to make labels for the tabs.  This is a great way to store the un mounted stamps while still allowing you to see all of them.  It was suggested to stamp all the images and then put them in a page stampstorage2protector, but I cheated and used the inserts from the stamp packages themselves, or the backings to the clear stamps in clear page protectors. 


I decided this might be a way for me to store my Nestibilities as well.  I had previously kept my Nesties on a magnetic sheet, but my collection was growing and I was afraid I was losing track of the dies.  So I purchased some plastic binder dividers from Staples ($1.99 for a pack of 5)

nesties1I would recommend using the plastic ones, since the next step is going to make the divider heavy and paper ones may rip.

nesties2I bought some photo magnet sheets at the dollar store.  Since it’s made to turn photos into magnets, one side is sticky and it’s perfect.  Adhere the sticky side of the magnetic sheet to the divider and then…


nesties3


You can keep an entire set of Nesties all together on one page! I used two magnetic sheets per page, and I did have to trip them a bit to fit the divider, but it works perfectly!  This takes up much less space and now I know where everything is.

Have any storage tips? How about a craft room secret? Be sure to enter my blog candy contest by going to THIS post and leaving me a comment :)

Happy Thursday!

Ciao for now,


Twitter Delicious Facebook Digg Stumbleupon Favorites More
This Is A Do-Follow Blog