Dress up your door

Yarn Wreath Tutorial.

Crumb Cake

Who would've thought?

Coconut Sugar Scrub

A simple, yet luxurious gift. Don't forget to make one for yourself!

Thursday, December 22, 2011

Under Wraps

I love wrapping presents.  Tying big bows of ribbon, making them all coordinated; it’s one of my favourite things about Christmas.

I had a great idea for my gift wrap this year, however my Slice machine decided not to cooperate.  I’m now awaiting an upgrade card from the manufacturer (which also means there won’t be any gift tags in my Etsy store until it’s fixed) and had to come up with another way to wrap my gifts.

My original idea included using kraft paper, so I decided to keep the kraft paper and do something simple.  Sometimes simple is better.


1324244844561

Brown paper packages tied up with string.


How do you wrap- with fancy bows? gift bags or boxes?

Tuesday, December 13, 2011

DIY Christmas gift- Coconut/Peppermint Sugar scrub


I love giving homemade gifts.  Last year I gave some cookies in a jar and they were a big hit.  While watching Steven and Chris on CBC, they had a segment by The Frugalista  on coconut oil (she has a great website by the way).  Her sugar scrub stuck out in my mind and I knew I had found this years gift in a jar.

There are many recipes out there, but I followed Frugalista’s using coconut oil.  Here’s what you need:


1) Containers:

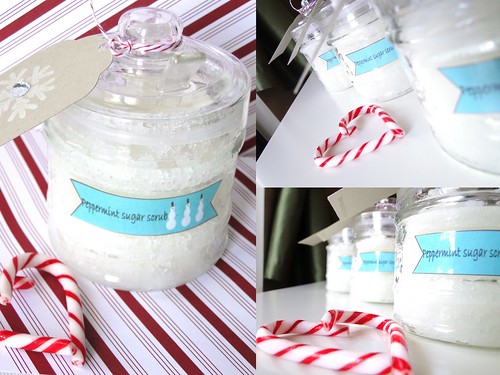
I found these sugar jars at my local dollar store. They were perfect because they had a lid and a little spoon!  If you can’t find a suitable sugar jar, I’d recommend a mason canning jar.  I think it’s important to have a wide mouth jar; if you don’t have a little spoon to scoop the scrub out, the recipient has to dig their fingers in the jar…much more difficult if the jar is narrow. I washed and dried the jars, and I removed the “sugar” sticker on them because I wanted to make my own labels.


2) Cocount oil:

I found organic extra virgin coconut oil at a local health food store.  This jar was $12.99 and was enough for the 6 jars I made.  You could likely substitute the coconut oil for olive oil if you wanted to.  I love the smell of coconut oil and it has very good moisturizing  properties, so I knew I really wanted to use it.


3) Scented oil:

This is the peppermint oil I use for my beeswax lip balm so I didn’t have to buy anymore.  You could use any essential oil you like, just make sure you’re not using baking extracts! {although since the recipe is just sugar and coconut oil, it would be completely edible…a little snack for the shower? ;) }

3) White sugar


C’mon, I don’t need to take a picture of white sugar, do I?


That’s it for ingredients!

Coconut oil is quite stable, meaning it can melt and then return to a solid form without any major consequences.  My apartment is a balmy 26 degrees Celsius year round, so I had to keep my oil in the fridge, otherwise it would turn to liquid.  Since the Frugalista measures her oil in solid form, I was convinced I had to have the oil solid.  I’m going to tell you to throw this out the window.  You have to melt the oil to mix it with the sugar anyhow.  The 1/4 cup of coconut oil that’s recommended in the recipe didn’t give me the consistency I was looking for.  So don’t worry if your oil at room temperature is a mix between solid and liquid, or all liquid. 

In a bowl you’re going to mix 1 cup white sugar with your coconut oil.  I will recommend you start with the 1/4 cup melted coconut oil that’s recommended, but I kept adding until I liked the consistency.  I wanted it to be a wet mixture; with 1/4 cup of oil, I found  the sugar to just be clumpy.  I ended up with close to 1/2 cup of oil, but mix it until you like it.  Add your essential oils; I never measure how many drops, I go by smell.


Now comes the crafty part…making the jars look pretty!


Labels are up first. 

I could have easily left the sugar labels that came with the jar, but I wanted something a little more festive.  You could design your own, or you could use holiday address labels.  Here’s a link to some holiday label templates from Avery. 

I decided to use the labels in my Stampin UP digital design free download, that I got a few weeks ago.  I chose the little snowman label.  I added the words “peppermint sugar scrub” and resized it to fit the space on my jar.

I printed them in colour and cut them out.   Since the scrub is most likely going to be used in the shower, I wanted to protect the label from water damage…which would make the ink run and get…well…yucky.

If you have a laminator, this is the time to use it!  If you’re like me, you resort to plan B and use shipping tape.

Sandwich the label in between shipping tape, and now it’s protected! Trim the edges and adhere to your jar.  I used double sided tape I use for making cards, it’s strong and sticky!


I wanted to dress up the jar a bit more, so I added one of my rhinestone snowflake gift tags and added some red and white baker’s twine to the lid of the jar.


Sugar Scrub

How cute are they!!!??

I’ve gifted one already and it was a big hit!  I also had some scrub left over and used it myself.  It smells amazing and left my skin so soft and smooth.  A quick and easy gift, easily made in big batches and quite cost effective! 


If you make some, take a picture and post it on my Facebook page!  Tell me what oil you used too!


Happy gifting!!


Thursday, December 8, 2011

Homemade gifts- Cookies in a Jar

If you’re looking for some ideas for homemade gifts, check out my post from last year on Cowboy cookies in a jar- a great gift to give, and easy to put together!

Happy Gifting!

Monday, December 5, 2011

The Postal Leap of Faith

     This is the time of year, where as an online business owner, I hold my breath every time I put a package in the post box.  I find myself saying a little prayer to the mail gods to deliver my customer’s order with speed and efficiency.  I pray to the Customs gods, that if they must pull the package, that they wrap it with the same care I did (I know…) and put it back in the mail system as quickly as possible.

As a Canadian Etsy seller, the majority of my customers are located in the US.  The estimated timeframe for letter-mail delivery to the US is 4-6 business days.  Most of the time, these time frames are upheld.  However, especially around this time of year, mail volumes go up, and turn around times may get longer.

I’ve done my due diligence and make sure my profile as my location as London, Ontario; I put notices in my announcements, the message that is sent when the order is  placed, in my acknowledgement email to the customer, and again in the shipping notice email. I ship all orders the next business day upon confirmed payment (unless otherwise stated). 

All my customers have been phenomenal.  If they don’t realize when they order that their cards are coming from Canada, they realize it when they send me a message and are always understanding. I recently received some feedback from a US customer that there was room for improvement with shipping; the customer, although very happy with her order, and stated she would purchase again, seemed to express disappointment that her tags took 1 week to arrive.  

1 week?! That’s fantastic!

At first I was confused, and a bit taken a back.  When I looked at the order and shipping dates, a little light bulb went off.  I think I understand her comment better now, but I think there are some things customers should keep in mind when they place an international order.


Here is some information about our Canadian Postal system that my international customers may not be aware of:

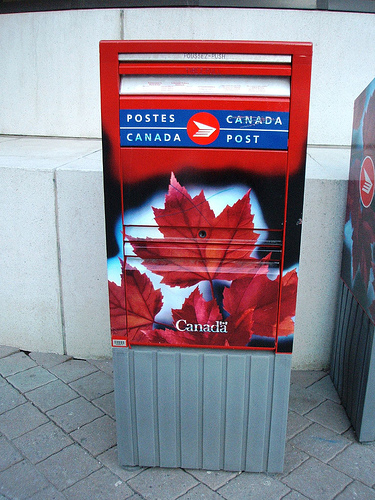
  •  Post boxes have cut off times.  Here in London, a major city with a postal processing plant, post box pick ups are scheduled for 10am
    • Some locations may also have an evening clear out of 5pm, typically these are post boxes that are in front of a postal outlet, or a mall. 
    • This means, if you put mail in the post box after 10am, it will not get picked up until the next business day.


  • We do not have Saturday mail service.   Our letter carriers work Monday-Friday. That means, if I put a letter in the post box, on Friday, and after 10am, it is not picked up until Monday morning. 
    • The customer I previously mentioned placed her order Friday afternoon; therefore when I put it in the post box on Saturday morning, it wasn’t picked up until Monday morning.  She received her order 5 days later, which is within the estimated turn around time for US lettermail.  She may not realize that we don’t have Saturday mail service, and thus she expected her order to arrive earlier than it did.


  • Customs can inspect the packages at random.  By law, I need to include a CN22 customs declaration when sending printed matter with a value under $500.  This means, each order has a customs form that I fill out.  Customs has the right to inspect these packages, which can delay the delivery times.  I have absolutely no control over what they inspect, or how long they hold on to it.


  • It’s all really a gamble.  I’ve had orders get to Australia faster than they get to the U.S.  I have no idea why, or how; aside from putting an “airmail” sticker and increased postage, the orders that are sent to the Australia are packed the same as the orders to the US.


This is a very busy time of year for mail; I know everyone is excited to receive gifts and purchases in the mail.  I feel very helpless when things don’t arrive when expected, and I will do everything I possibly can to ensure an order is in the mail as soon as possible.

I want to thank all my wonderful customers, who have had orders delayed due to customs inspections or other mail delays for their understanding.

I ask that the next time you make a purchase from a small business owner, that you take into account the location, where’s it’s coming from and where it needs to go.  Plan ahead if you can, and if the timing isn’t going to work out, ask if you can upgrade shipping, or consider something else.


Happy Shopping!


Picture source: Copyright © 2011 Joy Khoriaty - All Rights Reserved

Tuesday, November 22, 2011

My Etsy wishlist

Like it or not, Christmas is around the corner!  I admit that I’m just trying to make it to 5pm December 4th before I do anything remotely Christmas related.  At 5pm on December 4th I’ll have finished a weekend at The Met.  After that, I’ll be able to breathe.  Then I’ll have time to finish my own shopping, decorating, wrapping and all the things I love about Christmas.
I’m trying very hard to shop local and/handmade if possible this year, more so than in the past.  Except for some little kids I know, I will be choosing to purchase local/handmade items, or making things myself whenever possible. I’ve already purchased a few gifts on Etsy and have a few items in mind for the rest of the people I’m shopping for. 
I was taking a peek through my favourites on Etsy; I’m still amazed every day about the talent of the artisans.  Here are a few things on my Etsy wishlist:

A TwillyPop Bianca necklace. Or anything TwillyPop.  I have been eyeing so many things from her shop for a long time.
Photo credit: twillypop


A photo calendar.  I can’t decide between Paris or New York as they are two of my favourite cities.  EyePoetry Photography’s work is just absolutely gorgeous, so either would be amazing to hang on the wall.
Photo credit: EyePoetryPhotgraphy


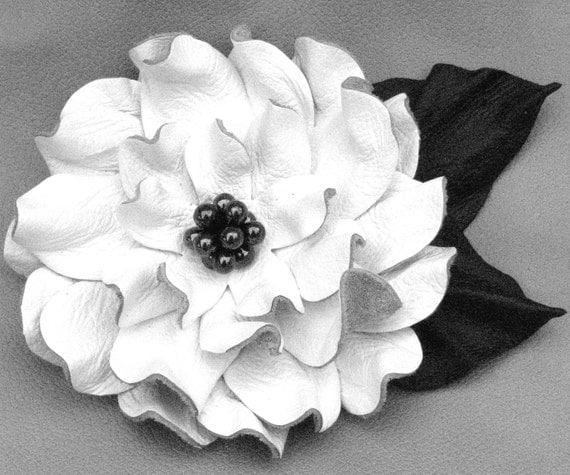
Isn’t this leather Dalia brooch gorgeous!  I’m very much intro brooches now and this one from Leatherblossoms is just beautiful!
Photo credit- Leatherblossoms


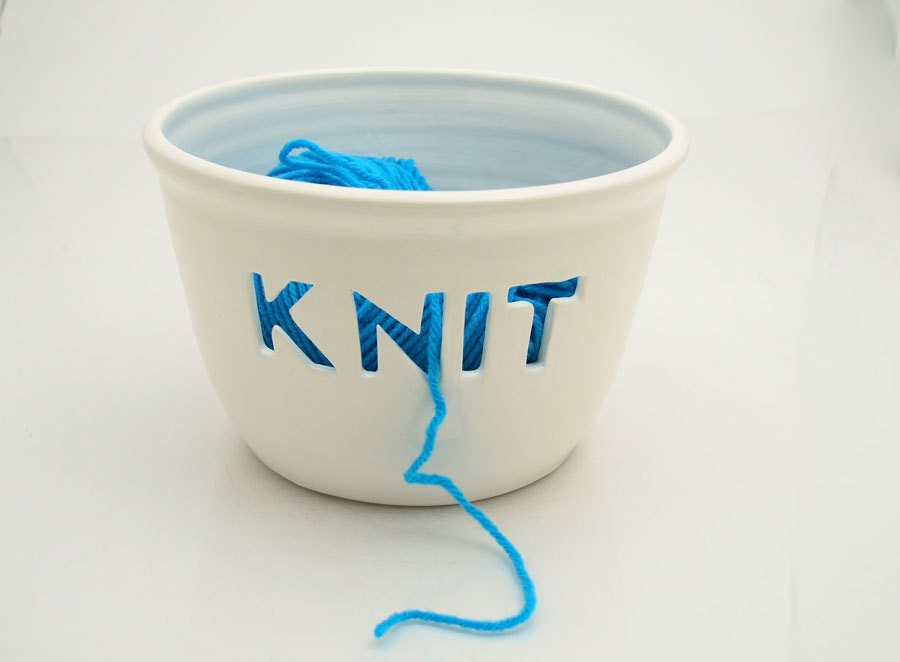
I love this yarn bowl from LennyMud.  I actually have a piece from the artist Lorrie, who very generously gifted a pink elephant to me after we both participated in a Thursday Sweet Treat challenge.  I have never forgotten her kindness and proudly display my pink elephant on my shelf in my office.  You can read the story of the Pink Elephant here.  Lorrie’s work is incredibly awesome and her Etsy store indicates she’s busy working day and night to keep her popular items in stock.  Unfortunately her knitting bowl has sold, but I will continue to keep my eye out for after the holidays and hopefully a few more will be available.
Photocredit: LennyMud


And finally, this picture from PibbleSlobberStudio.  I don’t know where I’d put it, but every time I see it, I can’t help but smile and laugh.  This may go in my office for some stress relief.

Photocredit: PibbleSlobberStudio


I hope that more people will find Etsy, or other avenues of shopping handmade and/or local.  It may not be possible for everything, and I have many things in my possession that are not handmade.  But when I have the choice, I will choose to purchase handmade or local.

Besides, it’s pretty exciting to shop online comfy and cozy with some coffee and look forward to a package in the mail amidst all the bills ;)


Happy Holiday shopping!
Stephanie

Thursday, November 17, 2011

Time to walk the walk

I have always said that I want this blog to be about more than just A Paper Buffet and my store.  I haven’t been doing that.  The past few weeks, I’ve been trying to blog more, but I haven’t kept my word about content.  The  majority of my posts have been a breakdown of my cards; the same pictures found in the listing, but I explain what colours I used. 

I’m not that boring in real life, I promise.

So, I’m committing, once again, to change up the content of this blog and make sure it’s about other things that just cards.  With the holidays coming, I have lots of ideas for homemade gifts, holiday decorating and some non-holiday related things.  I’ve been practicing some new things in photography so I can share that with you as well.  I will still feature some cards, but I don’t want to make it my entire focus.

I hope you’ll join me, or come back if you’ve left because of my boring content {I don’t blame you}.


And if you’ve stuck through it all, boring posts and me blabbing endlessly about different shades of cardstock- thank you!


Until next time,


Stephanie

Tuesday, November 15, 2011

Vintage card- part 4

Here’s another card made with some vintage Authentique paper.  I used the striped paper as the background and kept the rest of the card quite simple.


I used Old Olive as the card base and added a cherry cobbler mat.  I cut a poinsettia with my Slice machine from cherry cobbler paper; the poinsettia is cut in two layers and I really like the effect.  I used a large rhinestone in the centre of the poinsettia to add a touch of sparkle.


I stamped the Christmas tree in old olive ink; this tree is one of my favourite Christmas images and is from the Season of Joy set.  I cut out the Very Vanilla paper with my nestibilities, but before I removed it from the die, I sponged some Crumb Cake ink around the inside.  I’ve often seen this technique and was quite envious.  I’ve only recently gotten better at it, the trick is not to have too much ink on your sponge.


I used a scallop punch for the bottom edge of the DP, and placed a rhinestone in a pattern on the bottom. Finally, I added my absolutely favourite ribbon…which technically isn’t ribbon at all- it’s called seam binding in Cherry cobbler.

The inside of the card used come more Authentique paper (I seriously can’t get enough of it!), more scalloped border punch and distressed all of the edges.


I’m also really pleased how this card photographed. Some cards are very easy to photograph and some are…well an absolute nightmare.  I am getting better, but sometimes it’s still a struggle.


Happy Tuesday!

Twitter Delicious Facebook Digg Stumbleupon Favorites More
This Is A Do-Follow Blog