Dress up your door

Yarn Wreath Tutorial.

Crumb Cake

Who would've thought?

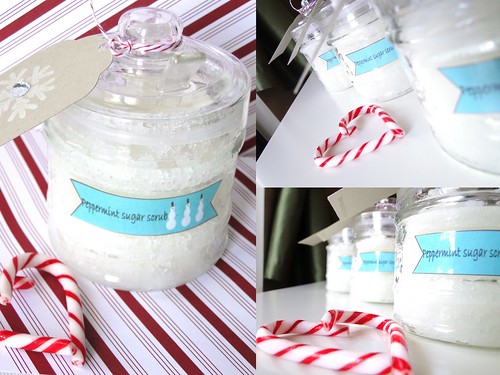
Coconut Sugar Scrub

A simple, yet luxurious gift. Don't forget to make one for yourself!

Showing posts with label etsy. Show all posts

Wednesday, November 14, 2012

It’s beginning to look a lot like Christmas…


Like it or not, Christmas is not that far away! I can’t believe how fast time flies and that the holidays are just around the corner.  I’m in full prep mode as I gear up for the busiest season for A Paper Buffet. This year will also mark the first holiday season for my new shop Knitley Road. I know blog posts have been scarce to say the least, but I’m hopeful I’ll be able to keep up and share all the new items in both shops over the next few weeks.


To kick off the holiday season, I’m sharing a project I’m so happy to present. I’ve had this concept in my mind for months and have finally put it all together and available at Knitley Road.

ornaments


I’ve knit up some Christmas ornaments in four different colours and embroidered snowflakes in contrasting thread on each of them. green Green and Ivory


grey

Grey and Red


red

Red and White


White and Blue


These ornaments would be great at the bottom of the tree as they don’t break or would look great hanging from a fireplace mantle- so cozy! 


I haven’t decided which one is my favourite, but I’m leaning towards the green and ivory one.


Which one is your favourite?


Wednesday, February 15, 2012

Hello!

How are you? It’s been a little while, I know.  Things have been quite busy here.  I had a great weekend at the Artist’s Affair Valentine Show and I’ve been working hard to restock the A Paper Buffet Etsy shop .  I have some great new ideas for 2012, but I don’t seem to have enough time to implement them all.  Don’t you hate when that happens? I’m trying to write them all down so that I can work through them one by one.  While holiday cards (Christmas, Valentine’s, etc) are very busy times for me, I also want to create some cards to keep on hand, that you can use for any reason…or for no reason at all!

I made a few of these cards for the Artist’s Affair show and got some really great feedback (and sold out!)  I’ve expanded the line and added a new option in the shop.  I’m going to call this the “hello” line, for lack of a better title.

Each card is made with a kraft base, with a stamped animal inked in a colour to match the card stock matting.  I love the white space on the card- which is usually a bad thing!

Lion


Owl


Fox


Turtle


Whale


I can’t decide which is my favourite, so I’ve decided you shouldn’t have to either.  I’ve offered a “choose 3” option in the shop (along with a slight discount for buying the set) so you’ll never be caught without a card!


So, tell me if you had to choose, which one is your favourite?


Sunday, January 8, 2012

Cheers to 2012!

Happy New Year!  We’re a week into 2012 and so far it’s very looking promising. I have some great ideas, and hopefully I’ll be share them with you soon.  Did you make any New Year’s Resolutions? {have you broken them already?}.  I only made two this year; one was to complete a Project 365.  I’ve committed to taking a photo every day for a year.  I started a  Project 365 set on my flickr page . I’m trying really hard not to only use my cell phone, but it’s just so much easier to upload it that way. 

My other resolution was to “do what makes me happy”.   Today, what makes me happy is playing with some new stamps and paper and making Valentine’s day cards for the store.

When I saw the Mojo Monday 222 sketch, I knew I had to play along.  Here’s my card following that sketch.

From time to time I make a card that I love so much, I have a hard time putting it in the store.  This is one of those cards.  I love how it came together. 

I love the black, red and ivory combination.


I also love how well it photographed. 


Fear not, I did put this card in the A Paper Buffet Etsy shop (and I have two available).

I’ll be adding some other great Valentine’s day cards to the shop this week using more of this gorgeous paper pack, so stay tuned!

Happy Sunday!


Card details:

Cardstock- SU Basic Black, Riding Hood Red, Very Vanilla

DP- SU Love Letter

Black grosgrain ribbon, heart brad, black rhinestones

Stamp: You and Moi

Tuesday, November 22, 2011

My Etsy wishlist

Like it or not, Christmas is around the corner!  I admit that I’m just trying to make it to 5pm December 4th before I do anything remotely Christmas related.  At 5pm on December 4th I’ll have finished a weekend at The Met.  After that, I’ll be able to breathe.  Then I’ll have time to finish my own shopping, decorating, wrapping and all the things I love about Christmas.
I’m trying very hard to shop local and/handmade if possible this year, more so than in the past.  Except for some little kids I know, I will be choosing to purchase local/handmade items, or making things myself whenever possible. I’ve already purchased a few gifts on Etsy and have a few items in mind for the rest of the people I’m shopping for. 
I was taking a peek through my favourites on Etsy; I’m still amazed every day about the talent of the artisans.  Here are a few things on my Etsy wishlist:

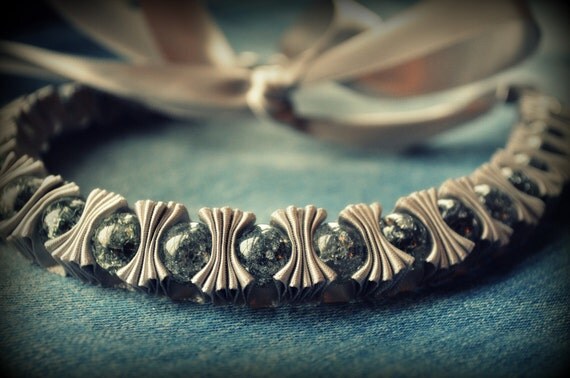
A TwillyPop Bianca necklace. Or anything TwillyPop.  I have been eyeing so many things from her shop for a long time.
Photo credit: twillypop


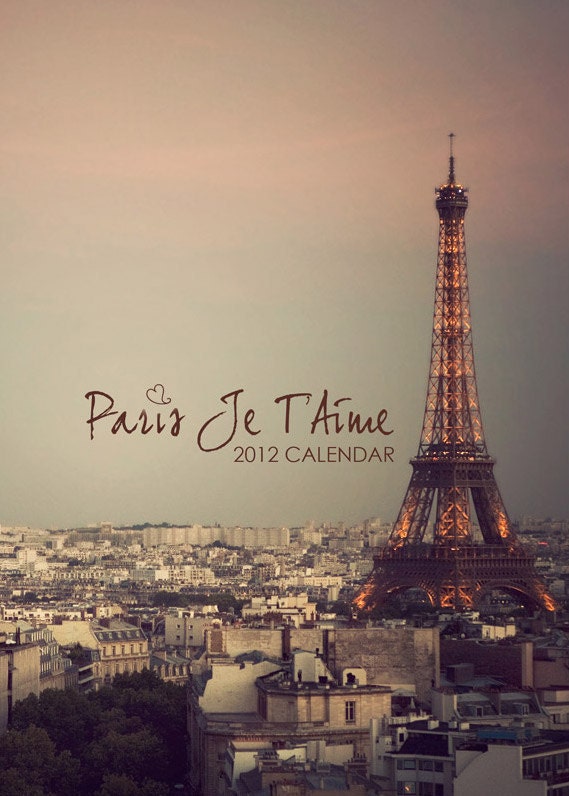
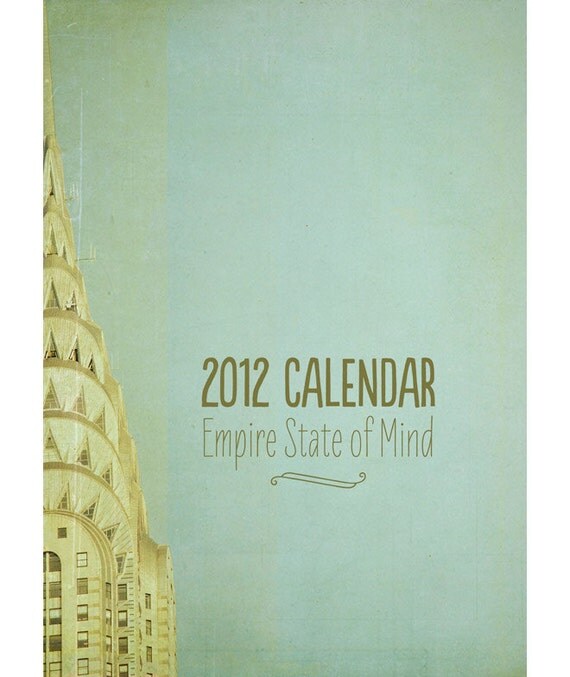
A photo calendar.  I can’t decide between Paris or New York as they are two of my favourite cities.  EyePoetry Photography’s work is just absolutely gorgeous, so either would be amazing to hang on the wall.
Photo credit: EyePoetryPhotgraphy


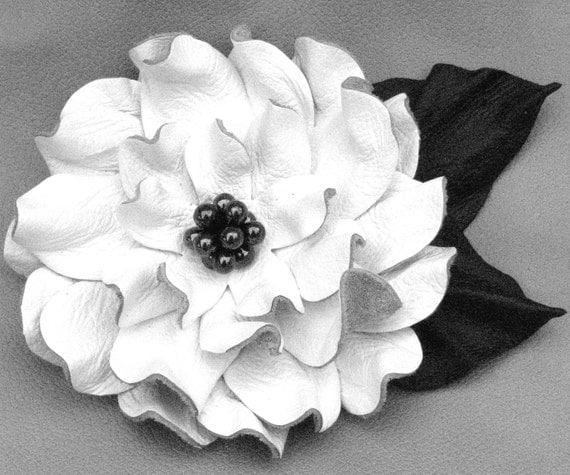
Isn’t this leather Dalia brooch gorgeous!  I’m very much intro brooches now and this one from Leatherblossoms is just beautiful!
Photo credit- Leatherblossoms


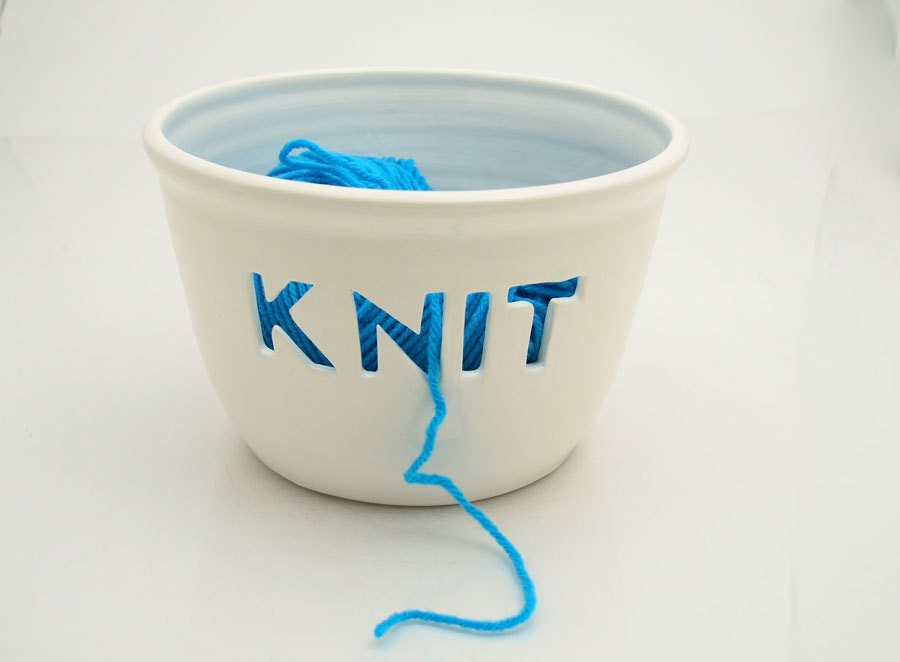
I love this yarn bowl from LennyMud.  I actually have a piece from the artist Lorrie, who very generously gifted a pink elephant to me after we both participated in a Thursday Sweet Treat challenge.  I have never forgotten her kindness and proudly display my pink elephant on my shelf in my office.  You can read the story of the Pink Elephant here.  Lorrie’s work is incredibly awesome and her Etsy store indicates she’s busy working day and night to keep her popular items in stock.  Unfortunately her knitting bowl has sold, but I will continue to keep my eye out for after the holidays and hopefully a few more will be available.
Photocredit: LennyMud


And finally, this picture from PibbleSlobberStudio.  I don’t know where I’d put it, but every time I see it, I can’t help but smile and laugh.  This may go in my office for some stress relief.

Photocredit: PibbleSlobberStudio


I hope that more people will find Etsy, or other avenues of shopping handmade and/or local.  It may not be possible for everything, and I have many things in my possession that are not handmade.  But when I have the choice, I will choose to purchase handmade or local.

Besides, it’s pretty exciting to shop online comfy and cozy with some coffee and look forward to a package in the mail amidst all the bills ;)


Happy Holiday shopping!
Stephanie

Tuesday, November 8, 2011

Vintage Christmas; part 1

Surprisingly, there’s no stamping on the outside of these cards.  I recently bought some gorgeous Christmas paper (Wonder by Authentique) and I just couldn’t bare to cover it up with stamped images. 

This paper has a very vintage theme, which isn’t something I normally work with, but I couldn’t resist this paper.  I added hand stitching to the border of the card to add some interest since I was using the paper as the main image.  I was most happy about using black and red, what an impact it has!


I just love this old vintage Santa image, and the postmark just adds to it.  I decided to dress up the inside of the card since the outside didn’t have anything extra


I added some more of the Authentique paper, and a border of green cardstock, punched with a lace punch.


The card base is cherry cobbler and I used some black paper for the matting.  The inside panel is more black with a

very vanilla panel. 


I’ve listed this in the A Paper Buffet Etsy shop  and I’ll be back tomorrow with another vintage Christmas card.


Happy Tuesday!


Monday, November 7, 2011

Coffee mug gift boxes

  Are you ready for some cuteness?  I am so happy to be finally sharing these with you.  I’ve made some cute new gift boxes that are shaped like coffee mugs! 
Just in time for the holidays and perfect for teacher’s gifts, the office gift-exchange or that hard-to-buy for person on your Christmas list.

I’ve been working over the past few weeks trying to figure out how to ship these, in a manner that won’t cost you your first born child.  Shipping is very expensive here in Canada; funny enough, it’s cheaper for me to ship something to the U.S. than it is to ship within Canada!

I’ve decided, due to the cost of shipping, to sell these paper mugs in sets of two.   You can gift these as a set, or individually. 

Aren’t they adorable!  Each mug is 3” high and has a diameter of almost 2.75”.  You can fit a package of hot chocolate and some marshmallows, or some little cookies inside.


   These will be perfect filled with little goodies; I’d wrap some clear or Christmas cellophane around the whole mug and tie it with some ribbon.  It’d be so sweet!


I’ve made these mugs in three colours, and they’re available in the A Paper Buffet Etsy shop 


You’ve already seen the green set, so here is the blue:


and red:

I can’t decide which one I like the most- they are so cute!


What would you put inside your paper coffee mug gift boxes?  Chime in below!


Happy Monday!


Thursday, September 1, 2011

The envelobox: never fear of adding bows and flowers to your cards again!

When I receive a custom order for a card, or when I’m making them to give away {which is occurring less and less these days} I always have to consider if the cards are going to be mailed.  Not only is the weight important, but also the thickness.  Adding ribbon, bows, flowers and even layers of paper make the cards ‘thick’, which makes it harder to fit in a traditional envelope.  If you’re in Canada, you also know this affects the ‘slot of doom’ and the 2cm mailing rule before having to pay for an oversize stamp. But I digress.

I’ve finally found a solution- the envelobox!  A crafty combination of an envelope and a box, this allows the card to be ‘unsquished’ {yes, that’s a technical term} and won’t compress your embellishments.   The envelobox is made from 65 lb weight cardstock; it won’t prevent your card from being crushed, but your ribbons and flowers shouldn’t be compressed.


The envelobox has approximately 1/4” of space, much more than a traditional envelope.  I’ve often seen the stress on an envelope and worry that it might tear during shipping.  I’m not sure the envelobox can prevent it completely, but I’d guess it’s better.  It reminds me of a CD mailer, actually.


I cut, folded and glued the cardstock and used non-toxic envelope adhesive on the flaps, so they can be sealed like traditional envelopes.

The envelope can fit up to a 4.5” x 4.5” square card, and I plan to add some A2 size envelopes soon.


These envelopes are available in the A Paper Buffet Etsy shop and are sold in the set of 5 you see here. Custom orders are welcome if you prefer all the envelopes in one colour.


Happy Thursday!


Tuesday, August 30, 2011

One for the Mr. and Mrs.

This might be my favourite “word card” I’ve created so far.  I had to make the letters a little smaller in order to fit on a standard A2 card, but I’m really happy with how it turned out.

I just love this card!  I was tempted to leave in just the black and white, but when I remembered I had some glitter cardstock I couldn’t resist adding the hearts. 

I used Whisper White as the card base, and layered black cardstock.  I used my MM Slice machine to cut out the letters and punched the hearts with my MS heart punch.

There’s not much else to say about this card because the layout is simple, but it is time consuming with cutting out each letter and punctuation points.

This card is available in the A Paper Buffet Etsy shop and would be perfect for an upcoming wedding, or even an anniversary.

Come back tomorrow for another, more traditional wedding card.

Happy Tuesday!

Sunday, July 24, 2011

Happy Everything!

I enjoy making blank cards; ones that can be used for any occasion.  I had some gorgeous designer paper (but of course it was left over from another project and I can’t remember who makes it), and really wanted to highlight it. 

I really loved the bright colours, and the little birds.  I found some buttons that matched up well and glued them on.  I layered three paper flowers to keep the colour theme going.


I cut the tag with my Slice machine- I’m loving this little machine!  I haven’t had a lot of time to play with it, but it came in really handy for a wedding order I had (more on that later).


The card base for this card is Baja Breeze, with a layer of Pear Pizzaz, and Pumpkin Pie.  I rounded all the corners, and used some grosgrain pumpkin pie ribbon.


I’ve listed this card in the A Paper Buffet Etsy shop for your shopping enjoyment!


Happy Sunday!

Tuesday, June 7, 2011

Shop re-opened; rolling postal strikes continue

The union of postal workers have initiated rolling strikes across Canada.  I hesitated in re-opening A Paper Buffet on Etsy , but I’ve decided to go ahead.  There’s still a chance of a national strike, and if it’s announced, then I’ll close the shops again.   Orders will continue to be mailed out the next business day upon confirmed payment, but there could still be major delays due to the rolling strikes.

I’ve got some new stuff to add this week, and I’m working on some new products.  A big thank you for all your support as we work our way through this.

Happy Tuesday!

Tuesday, April 26, 2011

Floral Chiyogami for Mom, and For Japan

There is a lot of beautiful paper out there…and too much of it is in my craft room, but the Japanese Chiyogami paper is absolutely gorgeous.  I was more aware of buying coordinating papers this time around, vs buying all that I thought was gorgeous and trying to work with it later.  I knew immediately these patterns would work well together, but I didn’t realize just how well until I had put the card together.  With edges of gold and deep greens, this card is stunning.

I paired it with SU Old Olive and SU More Mustard paper.  I’ve never used More Mustard, but I’m quickly warming up to it. It worked beautifully with the patterned paper, and gives this card a rich elegance. 

As with the other Chiyogami cards, I want the paper to be the focal point, and so just a simple stamp of “Mom” in the right hand corner, some gold and green ribbon, some deep green rhinestones were added to the left side for some balance and I had to stop. 

This card is available at A Paper Buffet Etsy store and $2.25 from the sale of this card will be donated to the Canadian Red Cross relief efforts in Japan.  You can read more about the details of the donation here.


Happy Tuesday!


Sunday, March 27, 2011

Floating Birthday Balloons- CPS 211

While I’ve often worked with clear cardstock as an element of a card (my snow globe card, or my beaded Valentine card) but I had yet to make a card with clear cardstock as the base of the card.

The CPS 211 sketch caught my eye, and I was inspired by one of the design team card (Carla’s), which used clear cardstock as the base.  I figured now was as good a time as any!

I dug through my paper stash to find some clear cardstock I had left over from the snow globe cards, and cut it to a 5.5” square.  I decided on a birthday card, and brought out the My Mind’s Eye Fine and Dandy paper. 

I made the background the star pattern; I wanted something that would stand out as a background. I cut a square of Chocolate Chip cardstock with my Nestibilities square die and a piece of Whisper White in a smaller square for the inside greeting panel.  I placed this in the centre of my star background.  Working from the inside out, it’s easier to make sure the panel on the front of the card is completely aligned with the inside panel.  I also chose to stamp the ‘Happy Birthday’ sentiment on the star paper; I had thought of using Staz-On ink on the clear cardstock, but I only have it in black and really wanted to stay coordinated; I stamped the sentiment in Chocolate Chip ink.

Moving to the outside, I choose the teal polka dot paper as my main panel with a Chocolate Chip border and knew I would use the SU Birthday Whimsy balloons.  I love how these balloons look when cut out and popped up on dimensionals.

Matching the colours in the star paper, I stamped the balloons in SU Pumpkin Pie, So Saffron and Baja Breeze. I cut the balloons out and added some string, and layered them with different types of dimensionals.  I tied some Pumpkin Pie grosgrain ribbon into a bow and placed it over the strings.

I cut another square, using my Nestibilities small square die, in Chocolate Chip CS to put on the back of the front panel; that way, you can’t see the adhesive when you open the card. 

While I love the effect, I can say that clear cardstock is NOT my favourite medium.  It doesn’t fold as crisply, so it’s a bit difficult to hold the card down while you adhere the panels to make sure they’re in alignment.


I think the great thing about the clear cardstock is that it offers a bit of a surprise to the recipient of the card.  The card looks ‘normal’ when it’s laying flat, but when they open it…ta-da!  I’ve listed this card in the A Paper Buffet Etsy shop. You can see more great sketches at the CPS blog, it’s one of my go-to places for inspiration.


Happy Sunday!


Thursday, March 17, 2011

Interview Recap

Late last week I was contacted on Etsy by a student at University of Western Ontario here in London.  She {lets call her K} asked if she could interview me for a paper she is writing on London women and their handmade business.  We arranged a meeting for this past Monday and I met her at Starbucks.  We had  a great chat and I’m excited to see how her paper turns out.  K had interviewed a few other women, so I’m also interested to read what they had to say.

Participating in the interview made me realize how much A Paper Buffet has grown from a hobby to a business.

I thought I would share some of the questions, and my answers, as best as I could remember with you. So here we go!


Do you have a University or College degree?

I have an Honors Bachelors Degree in Kinesiology from the University of Western Ontario; I’m also a Certified Ergonomic Specialist.


Do you have a full-time job?

I work for an insurance company, in their Disability Management department.  I help people return to work after illness or injury, and I also conduct Ergonomic Assessments.


Have you always been creative?

Yes, my friends  call me Martha ;) I think I have creative ADD, if that’s such a thing.  My mind is always working, finding new techniques, colour combos, and inspiration in various things.  Aside from paper, I also knit, I’ve painted, I enjoy decorating and creating floral arrangements.  Just this past weekend,  I was putting a teal salad bowl on my dining room and suddenly wanted to sew a table runner and place-mats.  I can’t turn it off!


How did your business start?

I had been making cards for a few years, when my hair stylist opened her own salon.  I made her a card, and she couldn’t believe I had made it.  She told me I should sell them, and offered to sell them at her salon.  I found out about Etsy a few weeks later, while visiting another stamping blog, and decided to create a shop.  I signed up for Etsy over the Christmas holiday in 2008, and officially opened in January 2009.


Where do you sell your products?

A Paper Buffet is on Etsy; I have my own website, apaperbuffet.com, and I still sell cards at my hairstylist’s salon.


How is business?

Business is good!  2010 was a very good year.  I had more custom orders, and larger orders.   I don’t look at this as a hobby any more, or just trying to cover the cost of supplies.  I want to continue to make this business successful.


Do see your business becoming a full-time job?

No.  I love my job and want to further my career in Disability Management.  I enjoy my work, and also enjoy living a life my career allows me to have.  I enjoy having a creative outlet, but I don’t see myself doing this full-time…unless I win the lottery and can continue to travel with my lottery winnings ;)


What’s your biggest challenge?

Right now, I’d say time is a challenge, as is turning traffic into sales on my website.  My job can be demanding, my days can be long, and because I cover a large territory  I’m drained after a long day in the car.   With the websites the majority of sales come from Etsy; with my other sales from local customers I’ve met through some local art shows, or my friends and family.  It’s hard to get found on Google, understand SEO to increase your chances of getting found on the internet, and all the technical aspects that go along with having an online business.  I’m getting better, and learning so much as I go, but it’s definitely a learning process.


Do you advertise?

I don’t use paid advertising at this point; I have a Facebook Fan page, Twitter and my blog, however I’m careful how I use them.  I’m trying to find a balance between providing people updates about what’s in the shop, without being pushy.  I recognize that Facebook and Twitter are social media, and that’s how I want to use them.  I want my blog to be about me, and all my interests, not just a place to ‘push’ my product.


When are you most creative?

I always have an idea, and have numerous lists of new products or techniques,…that never stops.  But I do most of my work on the weekends, because that’s when I have the most time.  I try to use a few hours to create new products, and another chunk of time dedicated to photographing, editing and creating the listings.  My goals is to do the majority of that work on the weekends, and list during the week.  I’ll sometimes work during the week, depending on how I feel, and what the project is.


Have you met other artists in London?

Yes, just in the past few months.  I participated in some local art shows before Christmas and met quite a few London artists.  We chat on Facebook and Twitter and it’s been nice to meet other business owners, and learn from them or help them out. 


What do you like best about your business?

I feel very honoured that my customers are giving my cards to the important people in their life; to celebrate milestone birthdays, new babies, and weddings.  I’ve been lucky enough to sell to customers all over the world, including Singapore, Australia, Germany, Scotland and all over the US.  It means a lot to me that a customer thinks enough of my work, to give it to someone they love.


What are your goals for your business?

I set goals for each quarter, so my goal is to meet the targets I’ve set.  Overall, my goal is for A Paper Buffet to continue to grow, and to continue to be profitable.  If it ever stops being fun, I’ll take a break.


Is there anything else you’d like to say about handmade?

I think the handmade movement is just getting started.  I hope that more artists realize and believe that they are, in fact, artists and professionals.  I think that will translate to a more fair-market for our handmade items, and ensure customers feel good about local businesses and putting money into their local economies.


That’s it for the interview recap, I hope you enjoyed this little glimpse into A Paper Buffet.

Happy Thursday!

Tuesday, March 8, 2011

Coaxing Spring with Cherry Blossoms

I’m so over winter.  I’m ready to shed my winter coat and put on my spring swing coat from Paris {let’s be honest, if I could wear it year round I would…just because it’s from Paris}.  I’m ready to pack away the mittens and scarves and hats for another year.  I keep hoping if I make pretty flower cards, then maybe, just maybe, Mother Nature will get the hint and it will be spring.

  I picked up this Cherry Blossom stamp at The Paper Source last year while in Chicago.  This store is pretty much my idea of heaven. Gorgeous papers, including handmade Japanese paper as far as the eye can see.

I love this stamp in many colours, it looks great stamped and gold embossed.  But I had some extra red 65 lb paper from a custom Valentine’s order and thought the red and white combo was perfect for these blank notecards.


I made the envelopes in 4Bar size, just to be a bit different and used up some white notecards.  Just a simple cherry blossom stamp on the right hand corner.

These cards could be used for anything,and are perfect to keep on hand.


I made these in a set of 6, and they are available in my Etsy store .  I’ve also made one set with a red flourish, but I think my favourites are the Cherry Blossom cards.

Here’s to Spring!

Happy {fat} Tuesday!

{I’m making cinnamon pancakes for dinner- how about you?}

Tuesday, February 15, 2011

Collaged Nestibility background

I’m a huge fan of Spellbinders Nestibilities.  It’s rare that I make a card without using one die-cut from my growing collection.

I can’t recall where I saw this idea, but it’s stuck with me and I finally had the chance to try it out.

I used scraps of paper left over from the Love edition pillow boxes I made for my Etsy shop , and arranged/adhered them on a piece of cardstock.  Then I used one of my Nestibilities to cut out the collage, and it created a great background for this card.

This is a great way to use up scraps of patterned paper, while creating a unique background or focal point to the card.

I’m already making little piles of scrap paper that work together, so I can make some more collaged background shapes to have on hand.

Go and try it, I’d love to see what you come up with!

Twitter Delicious Facebook Digg Stumbleupon Favorites More
This Is A Do-Follow Blog